White spots on teeth: where they come from and how to treat them.

Before treating a white spot, we need to understand where it comes from, how far it extends and why it is visible.

Two spots can look alike and still differ in origin, in depth and in how they respond to treatment. One dates back to the formation of the tooth, before it even appeared in the mouth. The other appeared six months ago, under orthodontic braces.

The approach always follows the same order: identify the cause, estimate the depth, assess how noticeable the spot really is, then intervene as little as possible. Depending on the situation, the response ranges from simple monitoring to resin infiltration.

Dr Jérémy Haccoun, dentist Updated

Key points

See a case of white spots treated with infiltration

Recognising a white spot

What a white spot is

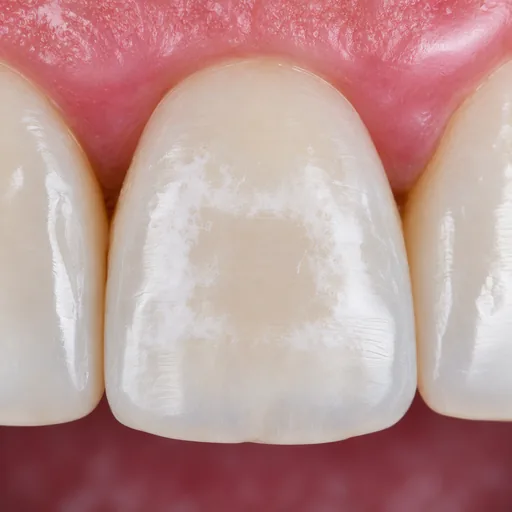
A white spot is an area of enamel that has become porous, beneath a surface that has stayed smooth. This enamel contains tiny spaces filled with air or water; it scatters back more light than the neighbouring enamel, and the area looks more opaque, like frosted glass next to clear glass.

That is also why a spot shows more when the tooth is dry. This variation is put to use during the examination.

Causes: braces, fluorosis, MIH, trauma

Spots that look similar can have very different causes. Some form while the enamel is developing, in childhood; others appear much later, on enamel that has already formed.

After braces
Demineralisation that has formed where plaque has stagnated. It is the most common cause in young adults.
Simulated illustration of white spots around the former position of an orthodontic bracket on an incisor.
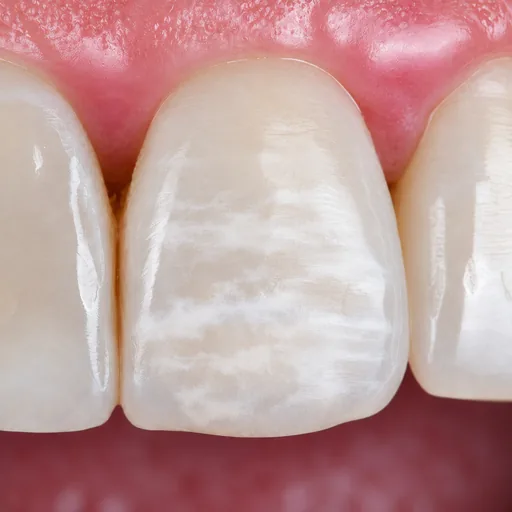
Fluorosis
Excess fluoride while the enamel was forming. The spots have no sharp border and are often found on both sides of the mouth.
Simulated illustration of diffuse white streaks and opacities on the enamel of an incisor.
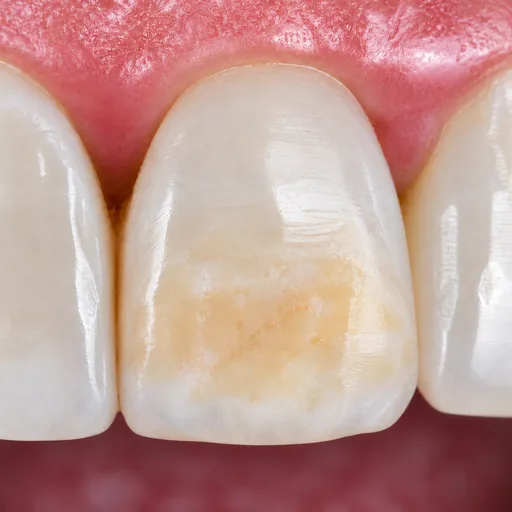
Hypomineralised enamel
A defect present from the time the enamel forms, with a clearly defined edge. Molar incisor hypomineralisation (MIH) is its most widely described form.
Simulated illustration of an extensive creamy-white and amber-yellow opacity on a permanent incisor.
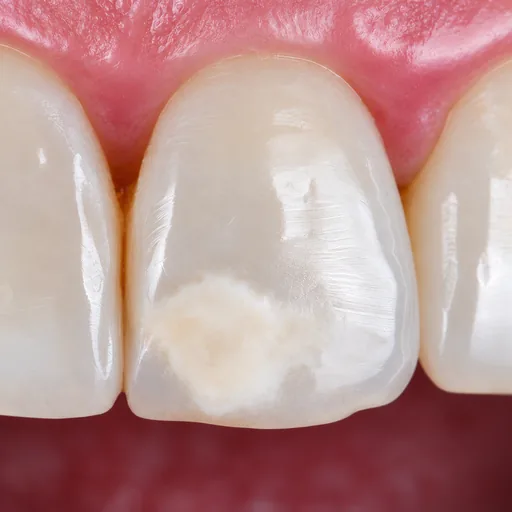
After trauma
Trauma to a baby tooth can leave a mark on the adult tooth that will later replace it.
Simulated illustration of a well-defined creamy-white opacity in the incisal part of an incisor.
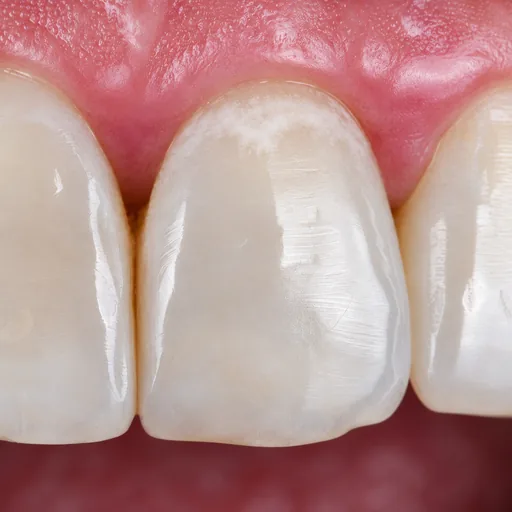
Early decay
Demineralisation that has not yet hollowed out the tooth: a sign to keep an eye on, before a cavity forms.
Simulated illustration of a white spot at the neck of an incisor, near the gum, with no visible cavity.

Simulated illustrations

To tell them apart, we look less at the colour than at the edge of the spot, sharp or blurred, at how it is distributed across the teeth and at the history of the tooth.

Understanding what you see

Colour is not enough

A spot is not always white: it can be cream, yellow, brown or a mix of several shades. The same brown does not mean the same thing from one cause to another.

In early decay, for example, a shiny brown colour most often indicates a lesion that has stopped progressing, more stable than a matt white lesion. With another cause, the same colour signals something else.

Colour gives a clue, but on its own it cannot tell what a spot is or whether it is serious.

The history of the tooth often tells us more than its appearance. Braces removed last year, too much fluoride in childhood, an injury very early in life: each cause leaves a different trace.

A tooth that has changed colour after an injury needs a separate assessment before any aesthetic decision: the cause may be something other than an enamel defect, and may involve the tooth at a deeper level.

Estimating the depth

What you see on the surface does not show how far the spot goes. An opacity may stay within the outer few tenths of a millimetre or extend much further into the thickness of the enamel.

No routine examination measures this depth: it has to be estimated. A useful guide: a spot that is still clearly visible on a wet tooth is generally deeper than one that only appears once the tooth is dried. Much of how predictable the treatment is depends on this estimate.

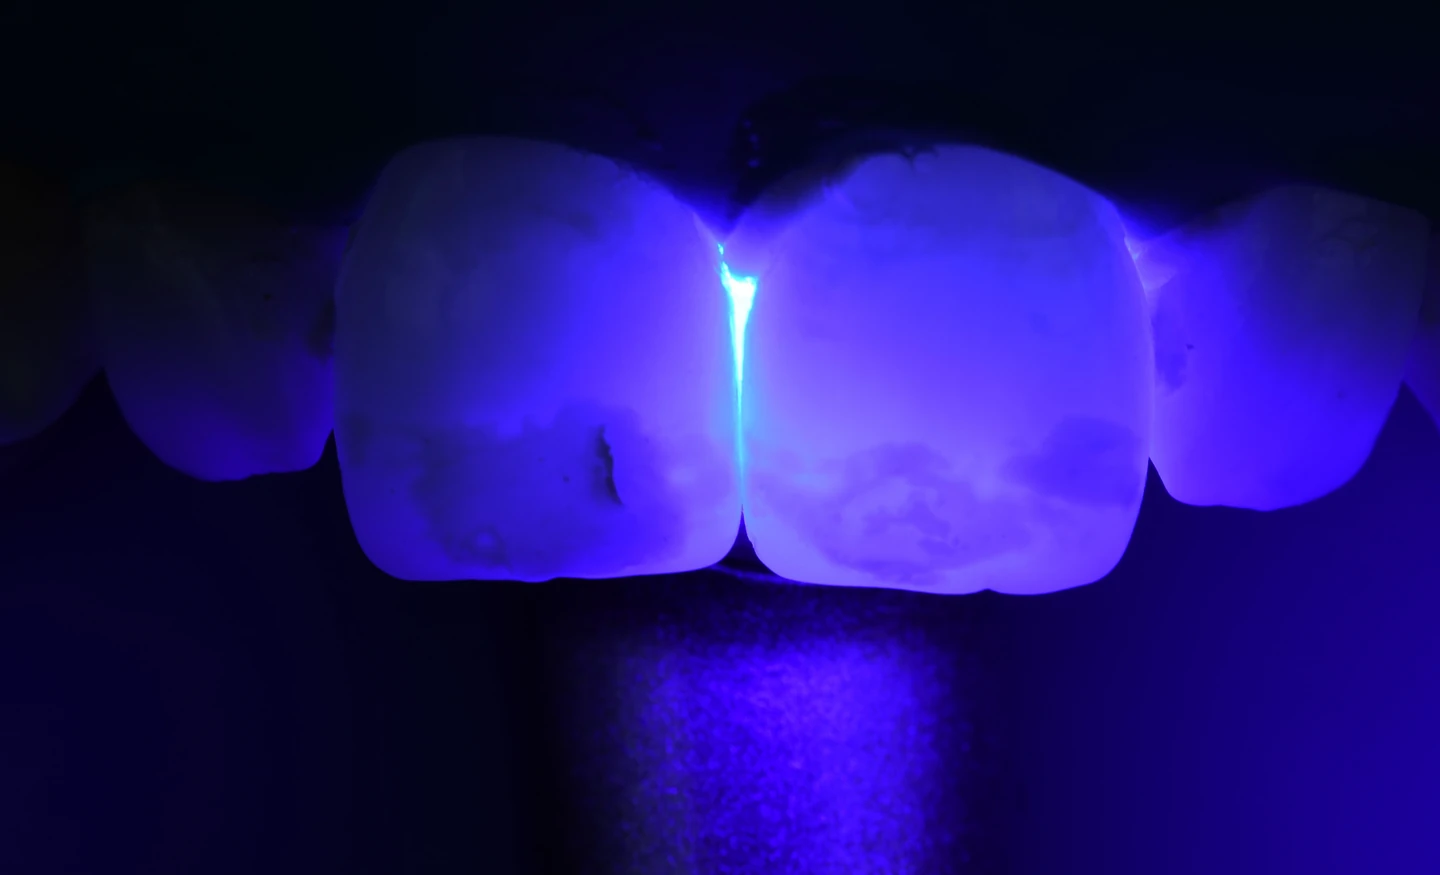
Examining the spots on the incisors by transillumination.
Transillumination, to help assess the depth of the spot.

Contrast with the surrounding enamel

How noticeable a spot is depends less on its colour than on the contrast between the spot and the enamel around it.

The same opacity can go unnoticed on one tooth and catch the eye on another, darker or lighter one. It is this contrast that treatment aims to reduce, and it is this contrast that is judged afterwards.

The examination at the practice

The examination follows a method: looking at the tooth wet and then dry, photographing it under consistent conditions, comparing it with the neighbouring teeth, and placing everything in the context of the patient’s history.

The indication follows from this examination. It answers five questions.

  1. What can be seen: the shape of the spot, its edge, its distribution.
  2. Where it comes from: the history of the tooth, not just its appearance.
  3. How far it goes: its depth in the enamel, which the eye cannot see.
  4. What surrounds it: the contrast with the neighbouring enamel, which determines how noticeable it is.
  5. What is indicated, and what is not.
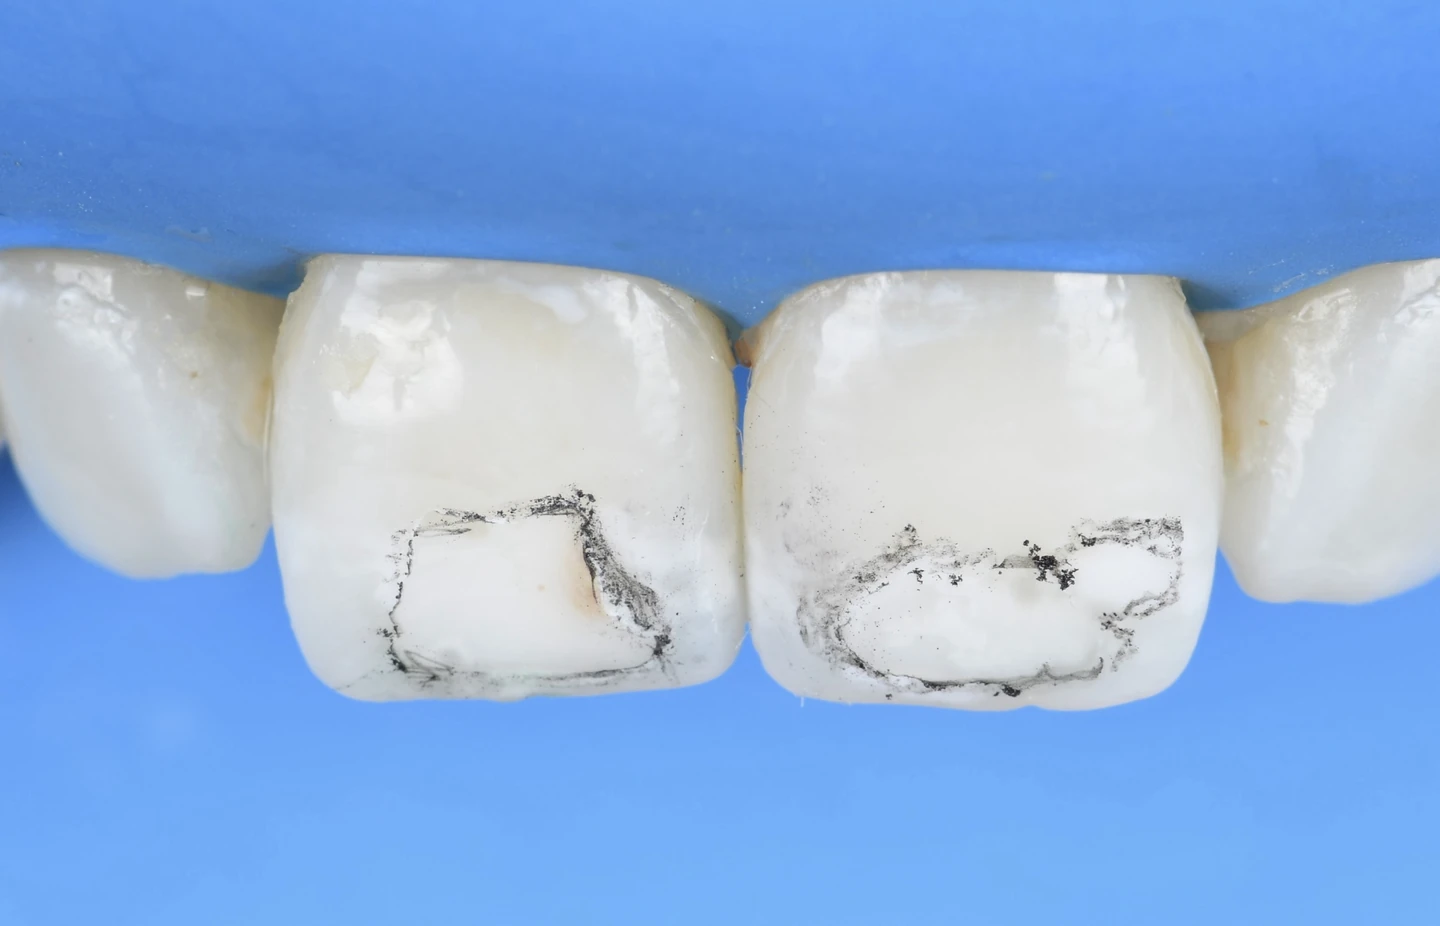
The outlines of the spots traced on the central incisors.
Tracing the outlines of the spots on the incisors.

Treating as little as possible

Monitoring without treating

The first option is to do nothing. Some opacities are stable, barely noticeable in conversation and pose no risk to the tooth. Treating them would mean intervening on enamel that does not need it.

Monitoring is then a decision in its own right: it is reassessed at check-ups and keeps every option open.

Whitening to reduce the contrast

When treatment is wanted, whitening is often the first step considered. It does not treat the spot itself: it lightens the enamel around it, which can soften a yellow or brown tinge and reduce the contrast.

It also means that not everything has to be decided on the first day. Once the shade has stabilised, we look at what actually remains, then decide whether local treatment is still needed.

This step is not compulsory, and published studies do not support making it a rule. The appearance of a spot can change during whitening, and the shade takes a while to stabilise: the result is assessed some time later, and a waiting period is needed before any bonded treatment.

Resin infiltration does not cover the spot or paint over it. A very fluid resin penetrates the pores of the lesion, wherever they are accessible. Light then passes through the enamel more evenly, and the contrast with the neighbouring enamel is reduced.

At the practice, infiltration is carried out with the Icon system. It is indicated for certain spots, particularly those that appeared after orthodontic braces; others respond little to it, which the examination tries to anticipate.

We do not hide the spot: we reduce what made it visible.

Icon infiltration, in pictures

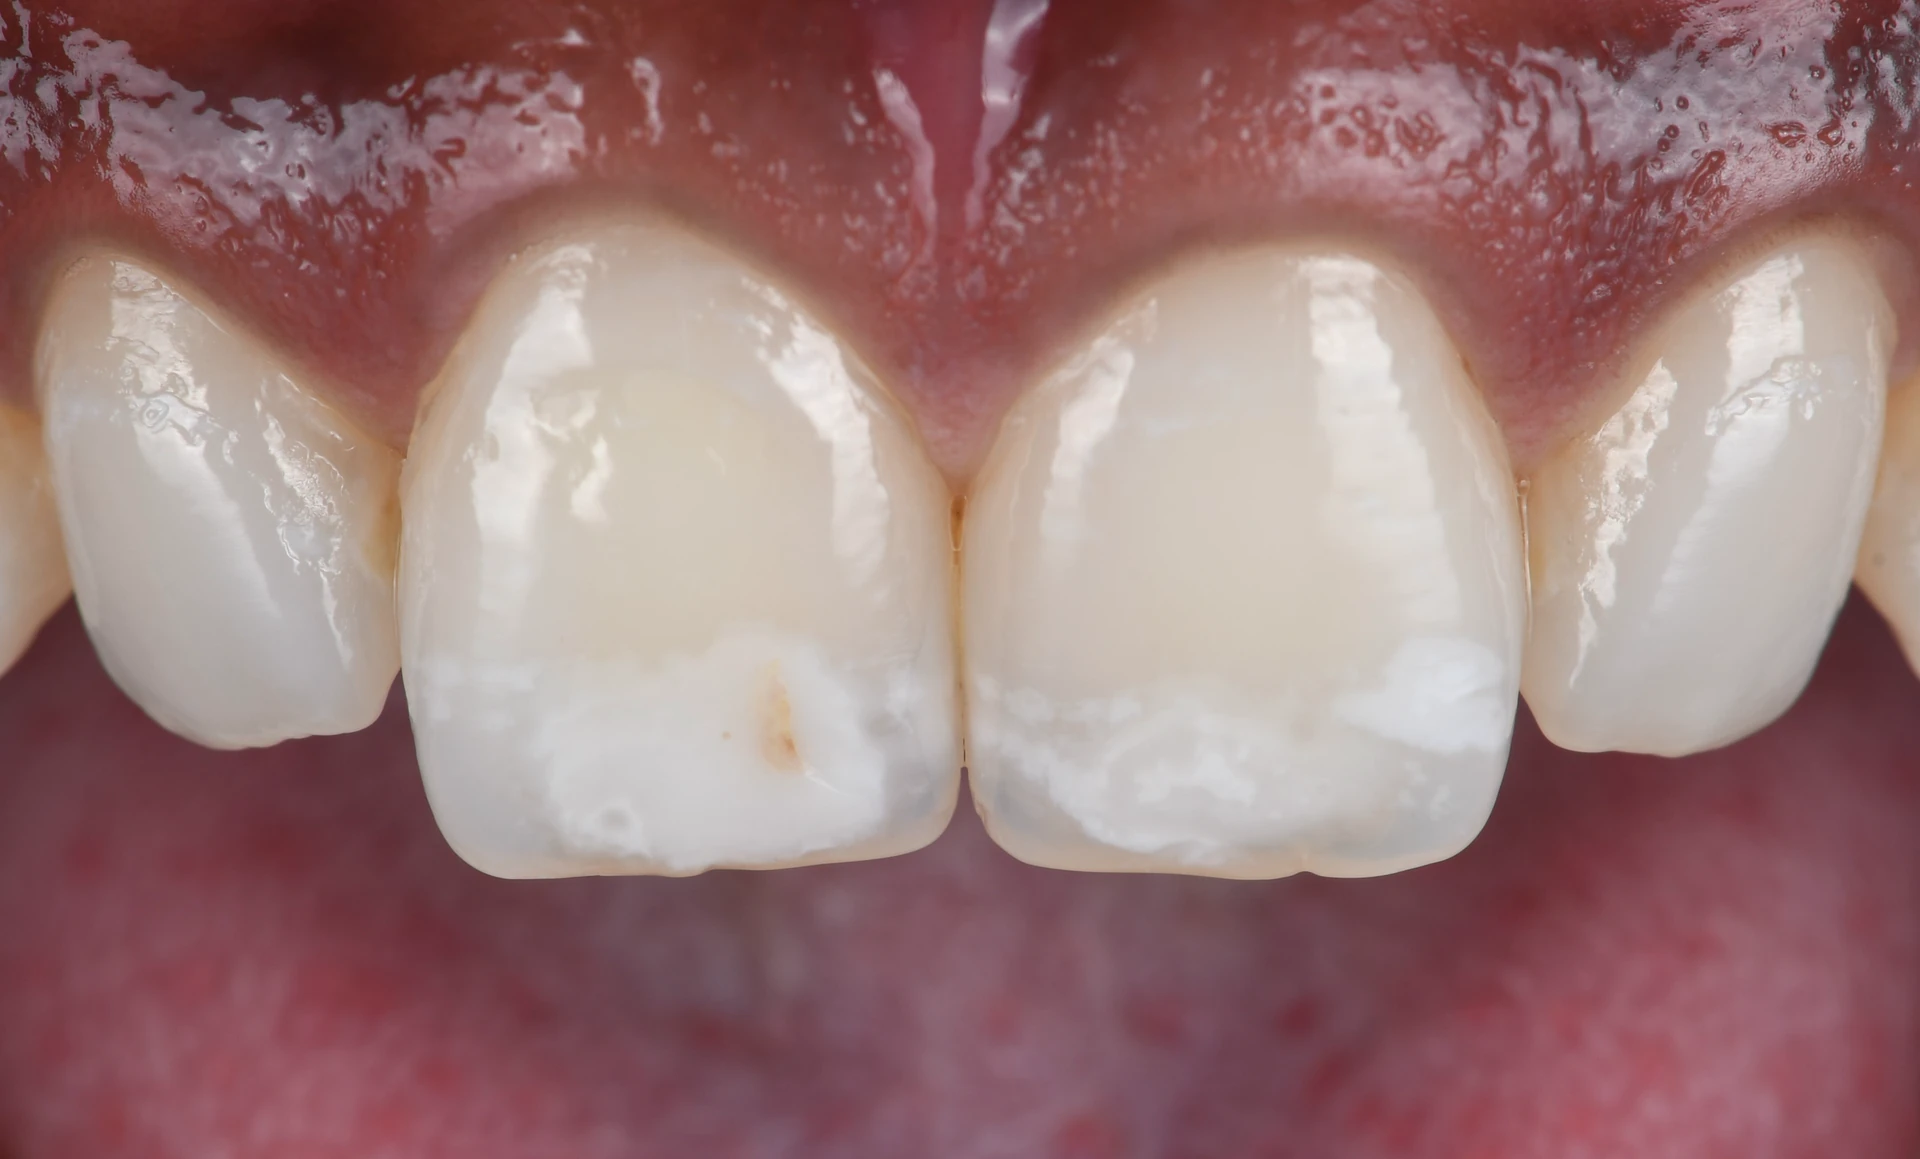
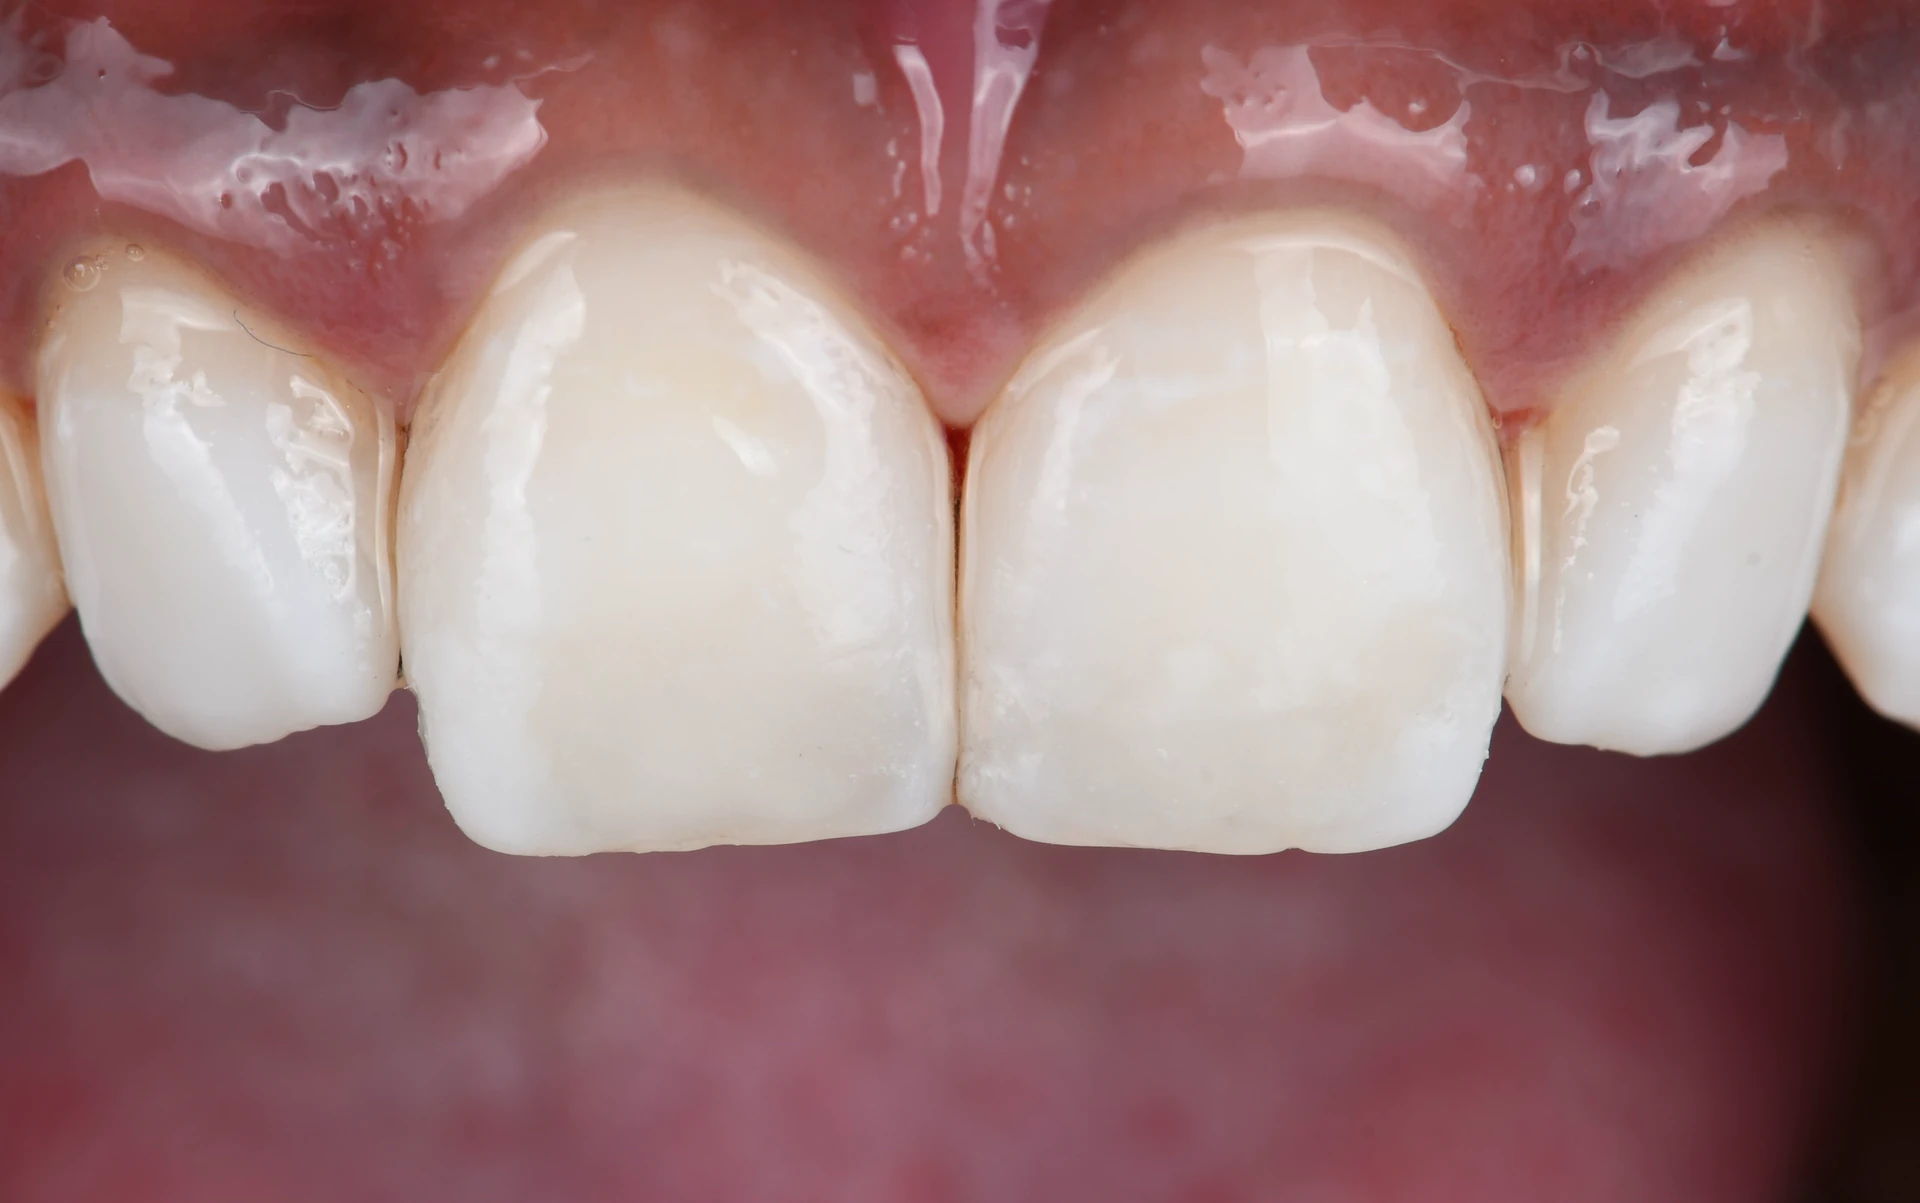
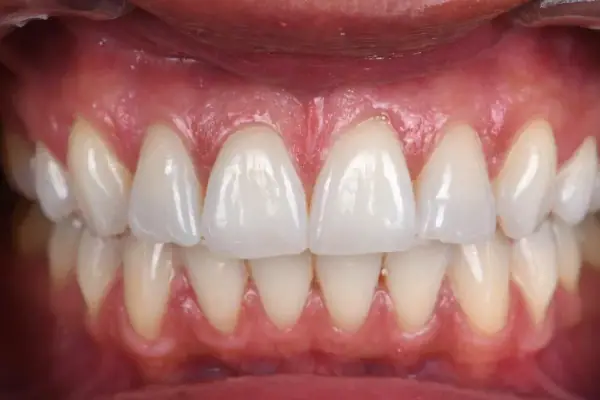
A case treated at the practice: white spots on both central incisors, and a thin brown line on one of them.

Before

White spots on the front teeth before treatment: opacities in the incisal third of both central incisors and a thin brown line on one of them

After

The same incisors at the end of the appointment, after Icon resin infiltration and micro-layering
Before treatment, then at the end of the appointment, after Icon infiltration and micro-layering. The result itself is judged some time after the treatment.

The steps are photographed under rubber dam: the blue sheet isolates the teeth during treatment.

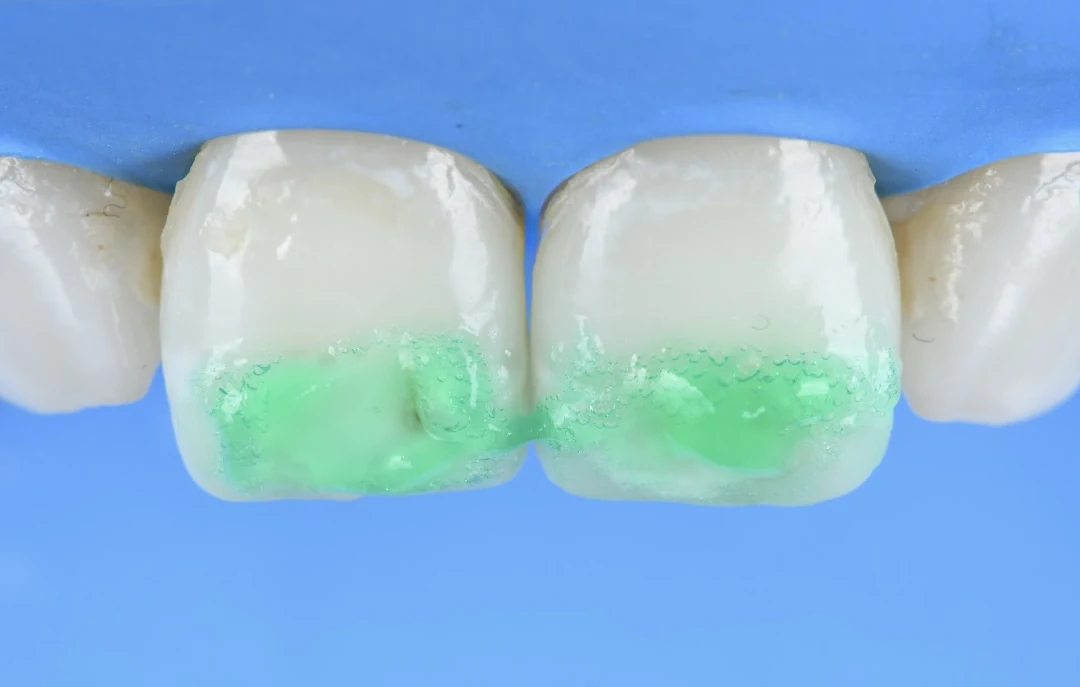
  1. Under rubber dam, green etching gel applied to the incisal third of both central incisors

    Etching

    An acid gel, applied in a controlled way, makes the pores of the lesion accessible. This is the etching step, hence the name “etching and resin infiltration”.

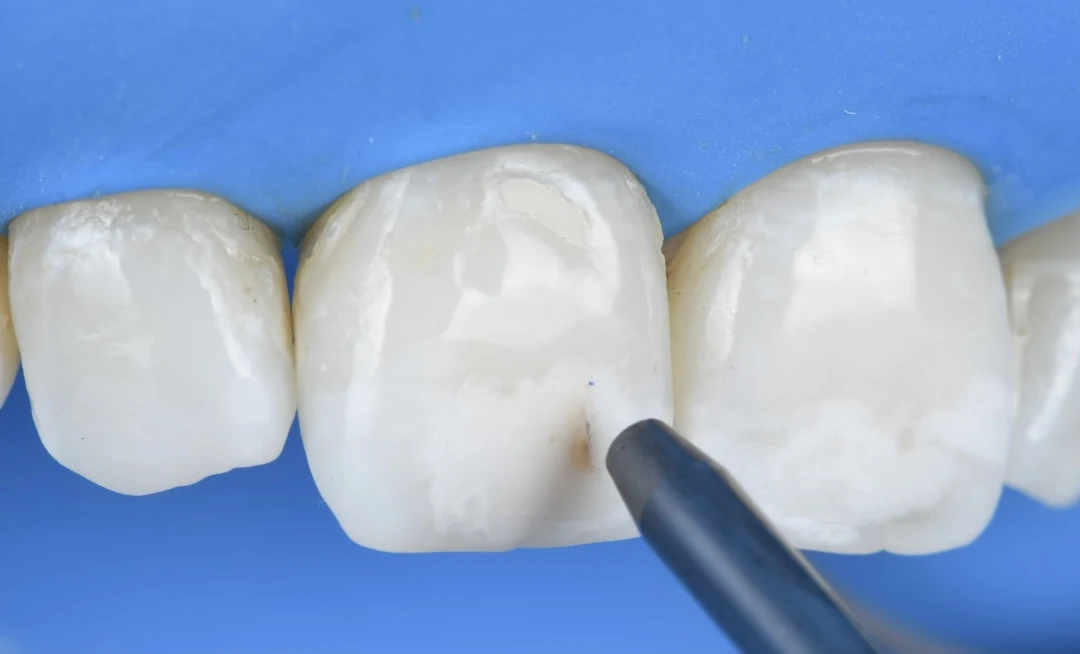
  2. Under rubber dam, an air-abrasion tip aimed at the thin brown line on a central incisor

    Air abrasion

    Air abrasion removes the surface layer and some of the brown pigment, so that the gel and the resin can work.

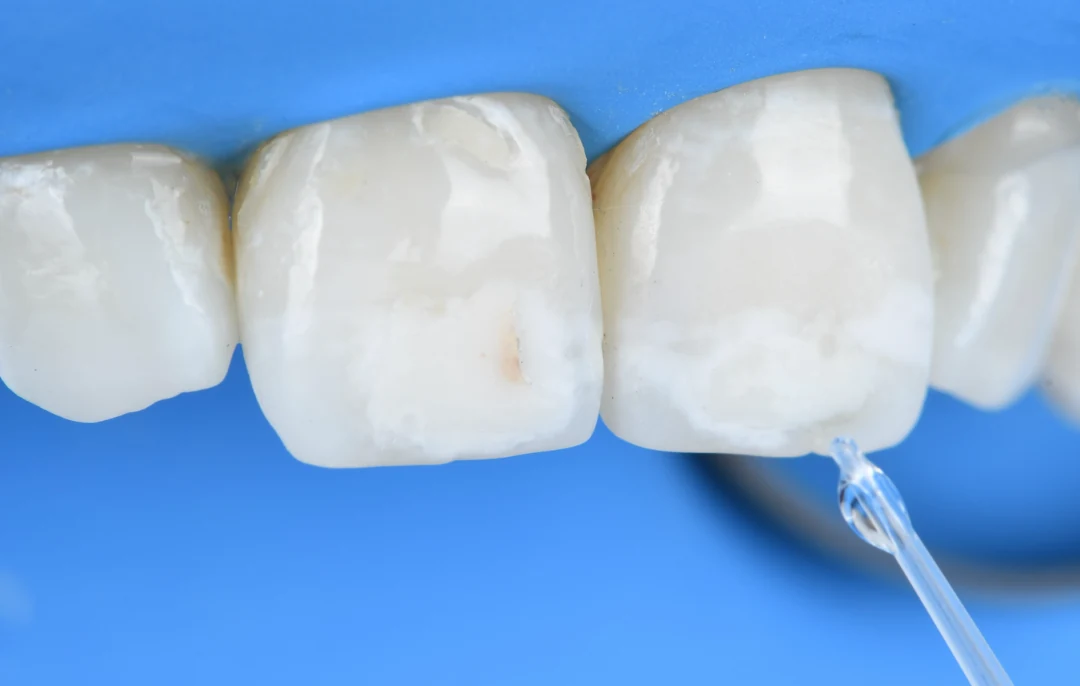
  3. A drop of Icon-Dry placed with a pipette on the incisors, isolated under rubber dam

    Icon-Dry

    The area is dried. This preview shows whether the etching is sufficient, or whether it needs to be repeated before the resin is applied.

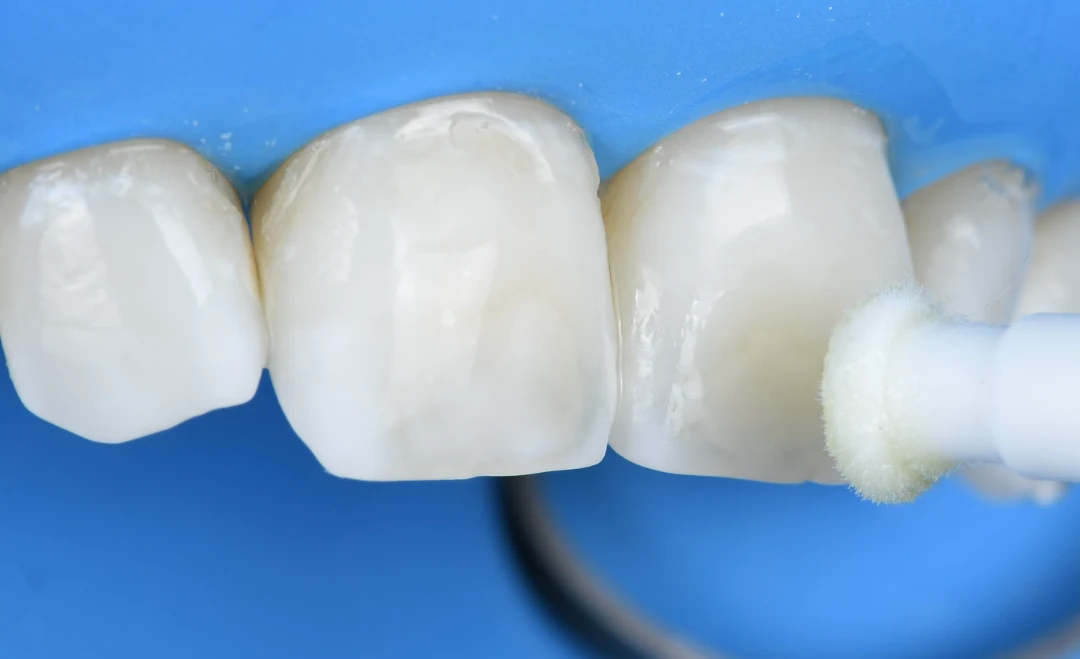
  4. Icon infiltration resin being applied with an applicator tip

    Infiltration

    The infiltration resin is applied with an applicator tip to the areas treated in the previous steps.

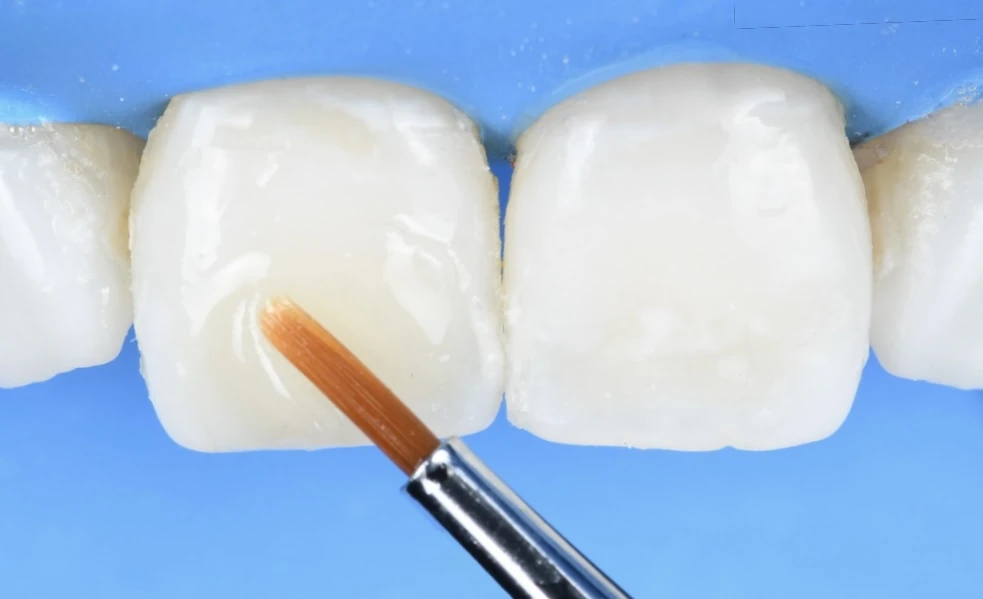
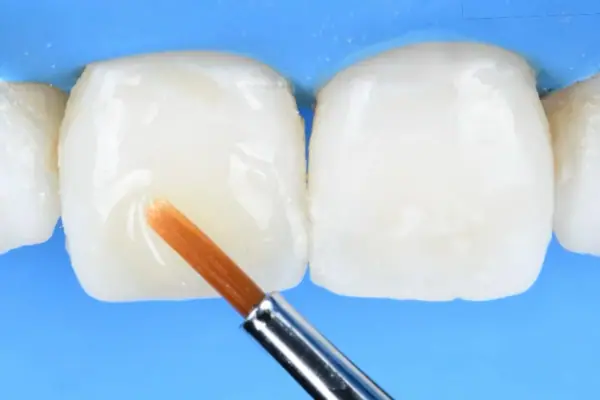
Under rubber dam, a fine brush resting on a central incisor during micro-layering.

In addition

Micro-layering

Sometimes a surface irregularity remains. To restore a consistent volume, micro-layering may then be needed: a thin layer of composite restores the shape of the tooth. This step is no longer infiltration: it is a restoration.

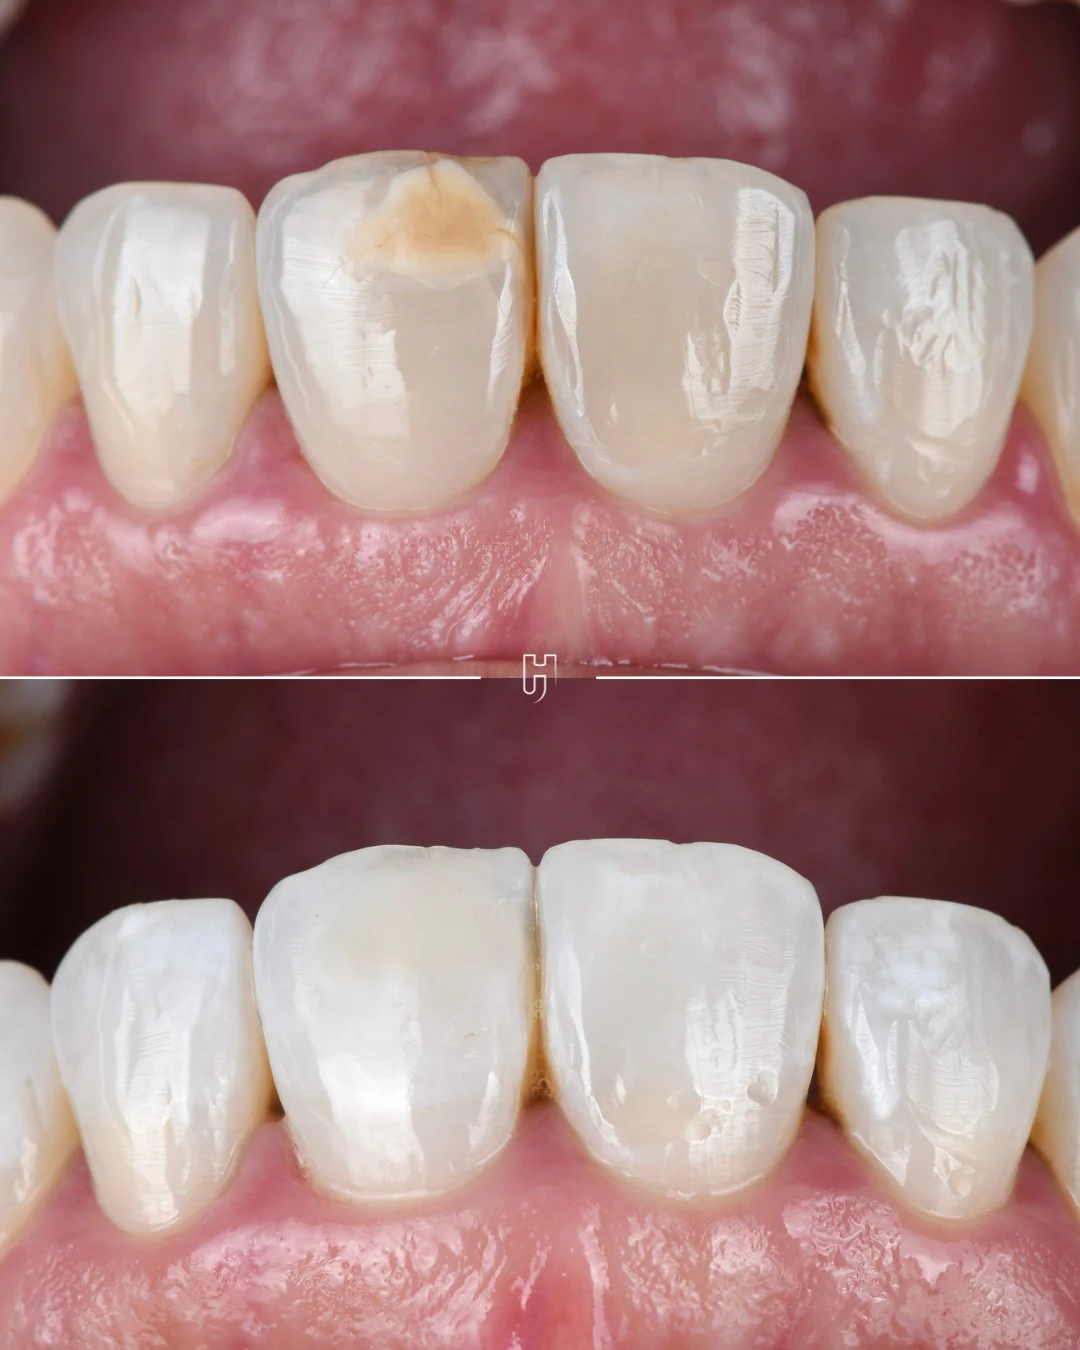
Another patient, before and after: at the top, a brown and white spot linked to trauma; at the bottom, the result after infiltration and micro-layering
Another patientAt the top, a brown and white spot linked to trauma. At the bottom, after infiltration and micro-layering.

Preservation Index

Little, but not nothing.

01 / 04

  1. 01No preparation
  2. 02Additive
  3. 03Minimal preparation
  4. 04Restorative

The index shows what a treatment takes away from the tooth and what it leaves. Infiltration sits at the first level: the tooth is neither prepared nor covered. A very thin layer of surface enamel is, however, dissolved to make the pores accessible. The first level means the most limited intervention on the scale, not the absence of intervention.

From least to most invasive

The possible treatments do not all remove the same amount of tissue. Ranked from least to most invasive, they form a scale: what leaves the enamel untouched comes before what alters it.

Monitoring
Leaving the spot untreated is a possible conclusion when it is stable and discreet.
Whitening
Acts on the overall shade of the tooth, without removing anything from it.
Resin infiltration
Fills the pores of the affected area. A very thin layer of surface enamel is dissolved to reach them.
Enamel microabrasion
Removes the outermost layers of enamel with a paste combining a dilute acid and an abrasive.
Localised composite
Adds material where the lesion has left a surface defect.
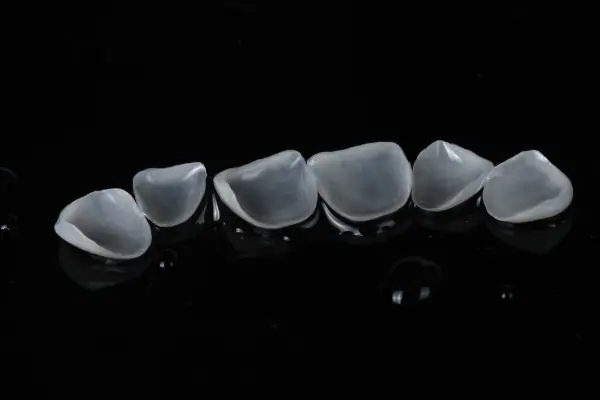
Ceramic veneer
Covers the visible surface of the tooth. Indicated when the shape, shade or position cannot be corrected any other way.

No one goes through the whole scale. It is there to place what is being proposed and to check that treatment goes no further than necessary.

Results and limits

The result varies from one spot to another. Some fade noticeably, others partially, and a few do not change. What determines it is the lesion itself: first its cause, then its depth, which can only be estimated. Spots that appeared after braces often respond better than defects in enamel formation, but the response remains individual.

The result is assessed some time after treatment, never on the same day: enamel that has dried out during the session gives an overly favourable picture.

Finally, the treated area picks up stains a little more readily than natural enamel. Polishing deals with this, and coffee and red wine call for a little care.

How long the result lasts, and maintenance

For spots that appeared after braces, which are the most widely studied, the improvement obtained by infiltration was maintained with no measurable change at six months, at one year and then beyond two years (thirty-four months on average), in the same series of patients followed up with a spectrophotometer. These follow-ups involve few people, twenty at the start and eight at the last check-up, and a 2017 systematic review reaches the same conclusion, with the same reservation: the effect has been demonstrated, but long-term data remain limited.

For fluorosis, a randomised trial compared infiltration, in-office whitening and a combination of the two: infiltration came out ahead immediately after treatment, particularly with a longer penetration time; how long the effect lasted was not measured. For hypomineralised enamel, the data are scarcer still, and the response depends on the depth of the lesion.

Day to day, the infiltrated area is cared for like the rest of the tooth: brushing, regular check-ups, and polishing at check-ups if it picks up stains. If whitening is wanted, it is done before infiltration: once in place, the resin does not lighten along with the surrounding enamel.

Cosmetic treatment of white spots is charged at €400 to €600 per tooth. When whitening comes first, it is charged separately.

All of this is set out in a written quote, given to you before any treatment.

Understand before choosing.

Why does a white spot appear on a tooth?

A white spot reflects an area of enamel that is less dense than the rest. This may date back to when the tooth was forming, before it came through the gum, or it may have happened much later, where plaque stayed in the same place for too long. Appearance alone cannot settle the question: it is the history of the tooth that points the way.

Can a white spot be made to disappear completely?

Sometimes. Often, it fades noticeably without disappearing entirely. What decides is not the technique used but the lesion itself: its origin, its extent, its structure. Two spots that look alike can respond differently to the same treatment.

Does treating white spots damage the tooth?

It depends on the approach. Monitoring and whitening do not remove any tissue. Infiltration includes a controlled acid-etching step: a limited but real amount of surface enamel is dissolved to make the pores accessible to the resin. That is why it is described as a micro-invasive technique: very limited, but not without effect on the tissue. When a restoration is needed, the preparation depends on the type of restoration indicated.

How long does the result of infiltration last?

For spots that appeared after braces, published follow-up studies show a stable result at six months, at one year and beyond two years, in small groups of patients. For other causes, the available follow-up is shorter. The treated area is cared for like the rest of the tooth, with polishing at check-ups if it picks up stains. How long it lasts cannot be promised: it is reassessed at each check-up.

References

  1. Knösel M, Eckstein A, Helms HJ. Durability of esthetic improvement following Icon resin infiltration of multibracket-induced white spot lesions compared with no therapy over 6 months: a single-center, split-mouth, randomized clinical trial. Am J Orthod Dentofacial Orthop. 2013;144(1):86-96. doi:10.1016/j.ajodo.2013.02.029
  2. Eckstein A, Helms HJ, Knösel M. Camouflage effects following resin infiltration of postorthodontic white-spot lesions in vivo: one-year follow-up. Angle Orthod. 2015;85(3):374-380. doi:10.2319/050914-334.1
  3. Knösel M, Eckstein A, Helms HJ. Long-term follow-up of camouflage effects following resin infiltration of post orthodontic white-spot lesions in vivo. Angle Orthod. 2019;89(1):33-39. doi:10.2319/052118-383.1
  4. Borges AB, Caneppele TM, Masterson D, Maia LC. Is resin infiltration an effective esthetic treatment for enamel development defects and white spot lesions? A systematic review. J Dent. 2017;56:11-18. doi:10.1016/j.jdent.2016.10.010
  5. Gugnani N, Pandit IK, Gupta M, Gugnani S, Soni S, Goyal V. Comparative evaluation of esthetic changes in nonpitted fluorosis stains when treated with resin infiltration, in-office bleaching, and combination therapies. J Esthet Restor Dent. 2017;29(5):317-324. doi:10.1111/jerd.12312
  6. Denis M, Atlan A, Vennat E, Tirlet G, Attal JP. White defects on enamel: diagnosis and anatomopathology: two essential factors for proper treatment (part 1). Int Orthod. 2013;11(2):139-165. doi:10.1016/j.ortho.2013.02.014
  7. Attal JP, Atlan A, Denis M, Vennat E, Tirlet G. White spots on enamel: treatment protocol by superficial or deep infiltration (part 2). Int Orthod. 2014;12(1):1-31. doi:10.1016/j.ortho.2013.12.011
  8. Lygidakis NA, Garot E, Somani C, Taylor GD, Rouas P, Wong FSL. Best clinical practice guidance for clinicians dealing with children presenting with molar-incisor-hypomineralisation (MIH): an updated European Academy of Paediatric Dentistry policy document. Eur Arch Paediatr Dent. 2022;23(1):3-21. doi:10.1007/s40368-021-00668-5

Every situation
needs its own diagnosis.

The information on this page is general. Only a clinical examination can establish whether a treatment is indicated, and clarify its benefits, limits and alternatives.

Message us