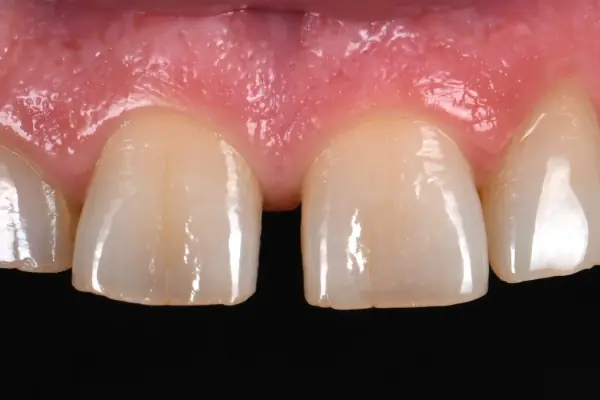
Smile design: making the plan visible before you decide.

Shapes proposed with your face as the starting point, which we look at, discuss and, where possible, try in the mouth.

Smile design is not a treatment, and the software used to draw it decides nothing. It is a time for planning and dialogue: what the examination has observed becomes an aesthetic dental plan, a concrete proposal that you have a say in.

Dr Jérémy Haccoun, dentist Updated

Key points

See how a mock-up is prepared

What you would like to change

Starting from your question

Teeth that have become shorter over the years, an incisor that looks wider than its neighbour, a smile you find too discreet. The concern is often precise; how to address it is much less so. One fear also comes up: that restored teeth will no longer look like your own.

Describing a change of shape is not enough to picture it. An extra millimetre on the edge of an incisor does not read the same way on a diagram, on a photograph and in a face that is speaking.

The plan starts from there: from what bothers you, and from what you would rather keep.
Observe, then design

Observing the smile within the face

Everything begins with the clinical examination: the condition of the teeth and gums, the restorations already in place, and function, meaning the way the teeth meet and work together when you chew, when you clench and when the jaw moves.

Photographs of the face and smile come next, sometimes supplemented by short videos. In these images, the lips matter as much as the teeth: what they show at rest, how much of the teeth they reveal when you smile, how they move when you speak. A spontaneous smile does not look the same as a smile posed for the camera.

The digital impression, taken with a small camera passed along the teeth, with no impression paste, provides a three-dimensional model of the dental arches. These elements are brought together during an assessment, and how it works is described on the first consultation page.

From image to volume

The plan takes three forms, and they do not say the same thing.

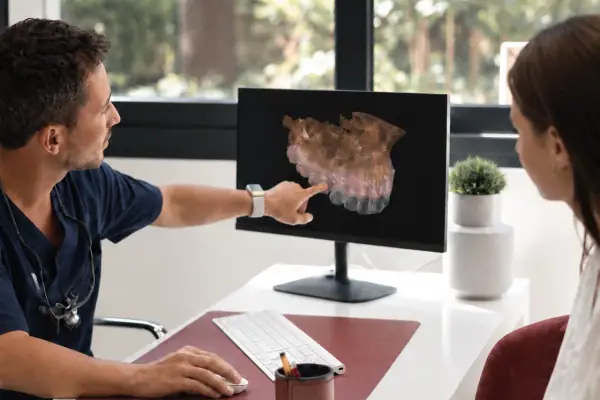
The smile simulation, prepared with planning software such as Smilecloud, draws the proposed shapes on a photograph. It helps to judge the proportions within the face, the length of the teeth in relation to the lips and the overall balance. It is only an image: one light, one angle, one moment.

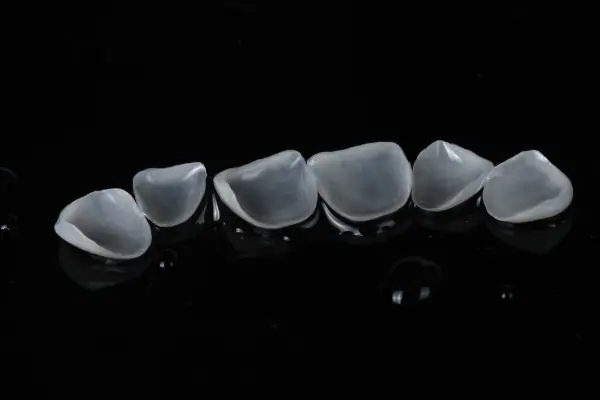
The dental wax-up gives these shapes volume: it is designed on a computer from the impression, then 3D-printed. The next steps start from this printed model.

Finally, the mock-up reproduces this volume in temporary resin, placed on the teeth for the duration of a trial, when this is indicated and feasible.

Not every step always takes place, and not always in this order. When an AI-generated projection of the smile is shown, it is presented as such: it helps you picture a direction, but it is not a result.

A design illustrated in four views

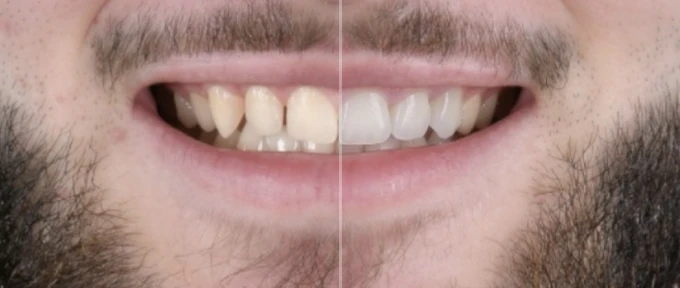
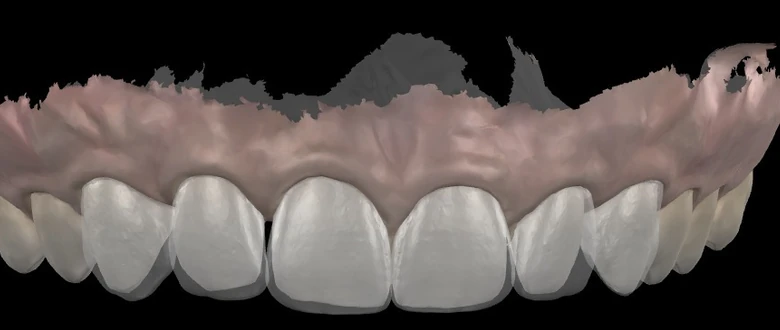
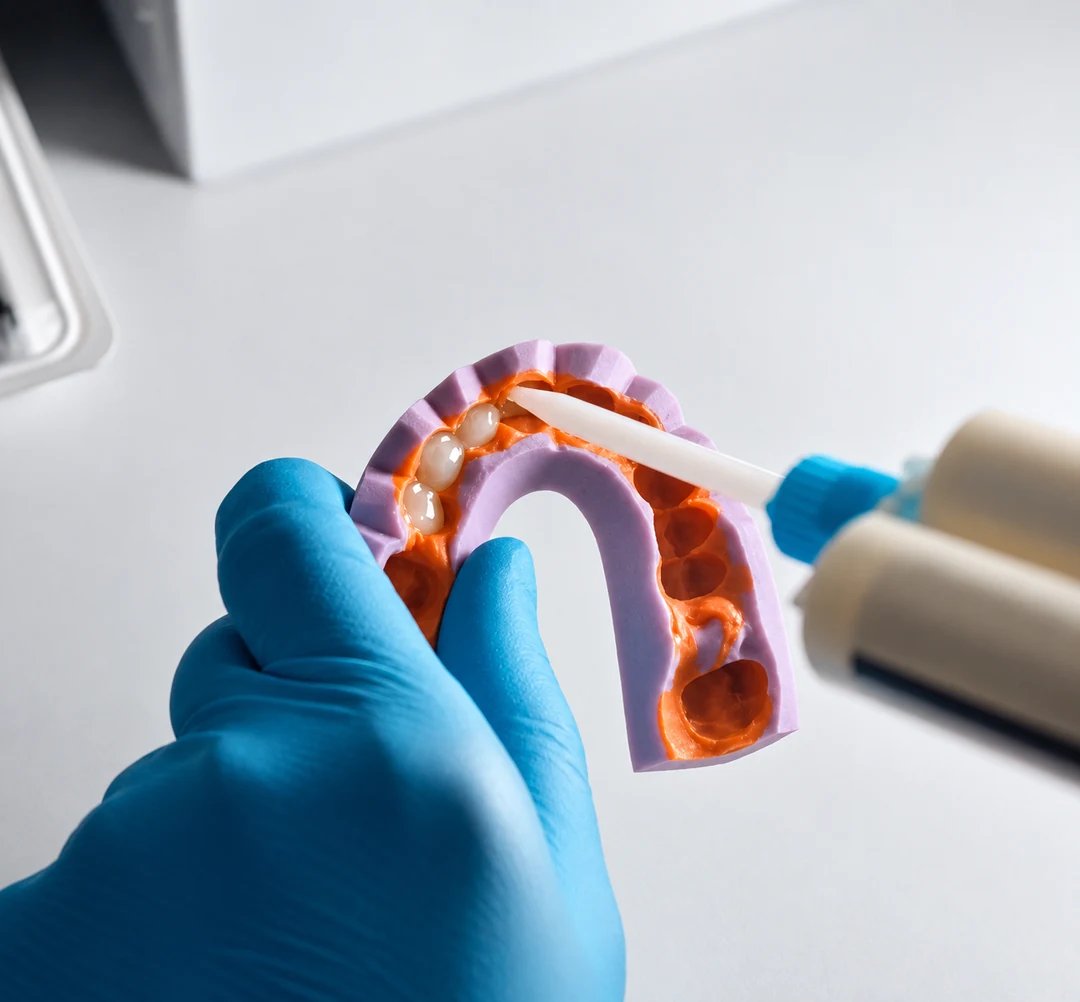
Four images: the starting point, the simulation on a photograph and the digital wax-up of a single patient, then the mock-up key that transfers the design onto the teeth. None of them shows a result: they are the basis on which the proposal is looked at and discussed.

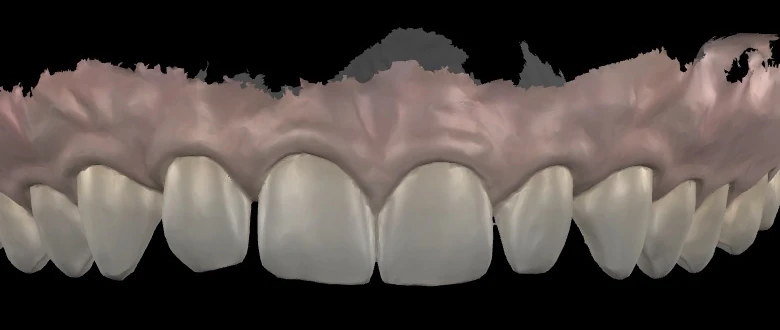
  1. Digital impression of the upper arch before any design work: the front teeth, gaps between some of them, the gums.

    Starting point

    The digital impression of the upper arch, as it is: the length and shape of the teeth, the gaps between some of them, the gum line.

  2. The lower part of a smiling patient’s face, in a photograph split in two: on the left, the current teeth, yellower and irregular; on the right, the simulation, with lighter, more regular teeth.

    Simulation on a photograph

    On the left, the smile as it is; on the right, the proposal drawn on the same photograph. The simulation helps to judge the proportions within the smile, without saying anything yet about volume or material.

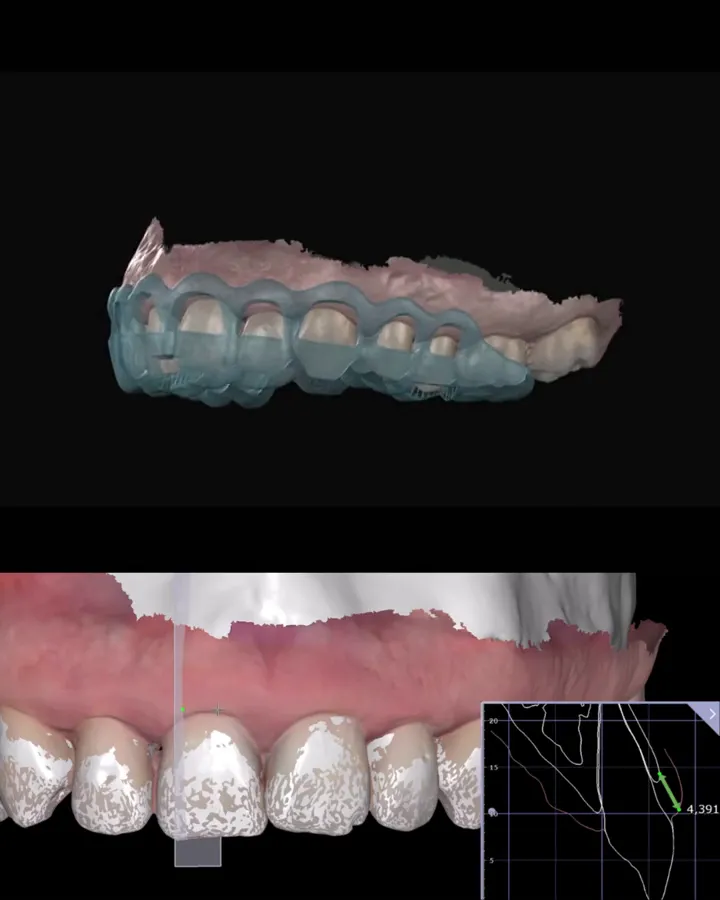
  3. Digital wax-up: the proposed shapes, in translucent white, placed over the impression of the upper teeth, longer and wider than the original teeth, which show through.

    Digital wax-up

    The shapes drawn on the photograph are rebuilt in three dimensions, in white, on the impression. Their transparency lets the original teeth show through: you can gauge what the design adds to each one. It is this volume that is then used for the trial in the mouth, when it is indicated.

A gloved hand holds a silicone key, an impression of the wax-up, while a syringe places the temporary resin into the imprints of the front teeth.

Transferring the project

The mock-up key

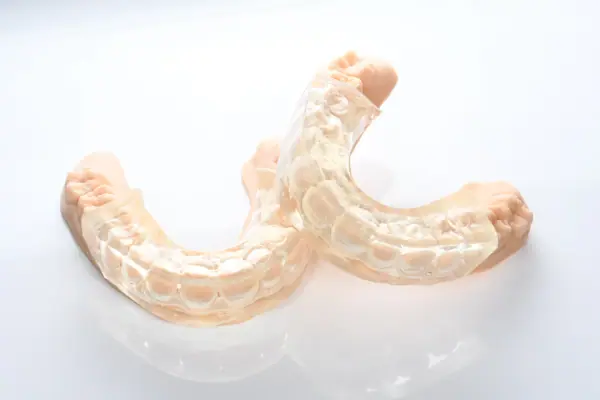
The mock-up key: a silicone impression taken from the wax-up, into which the temporary resin is placed. Seated on the teeth, it transfers the project onto them for the trial, without preparing them.

Try and adjust

Trying the plan in the mouth

Placed on the teeth without preparing them, the mock-up lets you assess what no image quite shows: the length of the teeth when the lips are at rest, the volumes seen in profile, the proportions within the smile, and the way the whole fits the face when you speak.

This is the time to ask for a slightly shorter tooth, a less regular edge, a more subtle change. The plan is then adjusted, and sometimes tried again. Some requests run up against what the situation allows, whether the space available, the position of the teeth or the gum: the reasons are explained, and the plan is adapted.

The trial has its limits. The shade, translucency, surface texture and feel of the final material are not reproduced. Nor does a short trial show how the teeth will work over the years: the examination of function remains just as important. The article on the mock-up explains how it is made and what it does not show.

From plan to treatment

Before ceramic veneers

For ceramic veneers, thin pieces bonded to the visible surface of the teeth, the plan is used first to discuss proportions: length, width, the shape of the edge. It also helps to decide the extent of the treatment (two teeth, four or more) depending on what shows when you smile.

Finally, it guides the preparation, which is calculated from the final volume and not from the tooth as it is now: the preparation can be very limited, but the plan cannot be taken as a promise that none will be needed. A clinical case from the practice shows the sequence: a plan tried in the mouth, a preparation guided by the mock-up, then two veneers.

Before injection-moulded composite

For injection-moulded composite, the 3D-printed wax-up is used as the model for a transparent silicone key. Placed over the teeth, the key guides the composite resin, which is injected and then hardened with light: the shape obtained follows that of the plan.

This key is not a mock-up. The mock-up is a trial that is removed; the key is used for the treatment itself, and what it shapes stays in the mouth. Additive does not mean fully reversible, though: the composite is bonded, its edges and contacts are adjusted at the end, and an old restoration sometimes has to be removed first.

When teeth are worn

When tooth wear has shortened the teeth, the plan helps to study the volumes to be rebuilt: the length to give back to the incisors, the height of the back teeth, and the way the dental arches will meet afterwards.

But the aesthetic plan does not treat the wear. The first step is to understand its cause (friction, acidity or brushing too hard), follow how it progresses and assess the forces the restorations will have to withstand. Depending on the situation, the answer may be monitoring, work on the cause or a reconstruction; neither veneers nor injection-moulded composite suit every kind of wear.

What the plan helps you decide

The plan does not commit you to any treatment. As long as nothing has been removed or bonded, it can be changed, limited to a few teeth, postponed or abandoned. It can also lead elsewhere: towards whitening, aligning the teeth, or simply monitoring.

It cannot promise that the result will reproduce the simulation exactly. The material, the tooth that receives it, the gum and time all introduce differences. No restoration has an assured lifespan, and no treatment is without risk: discussing the plan is also a time to talk about this.

Understand before choosing.

What is the difference between a wax-up and a mock-up?

The wax-up is the model of the proposed shapes, designed on a computer and then 3D-printed; it stays outside the mouth. The mock-up is a copy of it in temporary resin, placed on the teeth for a trial and then removed. It reproduces the shapes, but not quite the thickness: because it is moulded in a key, it is often slightly thicker than the plan it comes from.

Does the simulation show exactly what the final result will be?

No. A simulation on a photograph depends on the lighting, the angle and the screen it is viewed on; it shows neither the material nor how the gum will behave. It indicates a direction, which the wax-up and then the trial in the mouth help to refine. The result is judged on the teeth, not on the image.

Does the plan determine the material?

No. The same proposed shapes can be achieved in several ways, in ceramic or in composite for example, and part of the request is sometimes better met by whitening or by aligning the teeth. The plan helps to compare these options; the choice comes afterwards, depending on the examination, the extent of the correction and the maintenance each option requires.

Do you need a smile design to correct a single tooth?

Not necessarily in its full form. For a single tooth, the reference is often the tooth next to it: the aim is to match a shape, a length or an edge rather than to redesign the smile, and the plan can stay simple. The more extensive the correction, the more useful it becomes to see it in the face before deciding.

References

  1. Mahn E, Sampaio CS, Pereira da Silva B, Stanley K, Valdés AM, Gutierrez J, Coachman C. Comparing the use of static versus dynamic images to evaluate a smile. J Prosthet Dent. 2020;123(5):739-746. doi:10.1016/j.prosdent.2019.02.023
  2. Garcia PP, da Costa RG, Calgaro M, Ritter AV, Correr GM, da Cunha LF, Gonzaga CC. Digital smile design and mock-up technique for esthetic treatment planning with porcelain laminate veneers. J Conserv Dent. 2018;21(4):455-458. doi:10.4103/JCD.JCD_172_18
  3. Magne P, Magne M. Use of additive waxup and direct intraoral mock-up for enamel preservation with porcelain laminate veneers. Eur J Esthet Dent. 2006;1(1):10-19.
  4. Joda T, Balmer M, Jung RE, Ioannidis A. Clinical use of digital applications for diagnostic and treatment planning in prosthodontics: a scoping review. Clin Oral Implants Res. 2024;35(8):782-792. doi:10.1111/clr.14230
  5. Loomans B, Opdam N, Attin T, et al. Severe tooth wear: European consensus statement on management guidelines. J Adhes Dent. 2017;19(2):111-119. doi:10.3290/j.jad.a38102

Every situation
needs its own diagnosis.

The information on this page is general. Only a clinical examination can establish whether a treatment is indicated, and clarify its benefits, limits and alternatives.

Message us