White spots: Icon etching and resin infiltration, then micro-layering

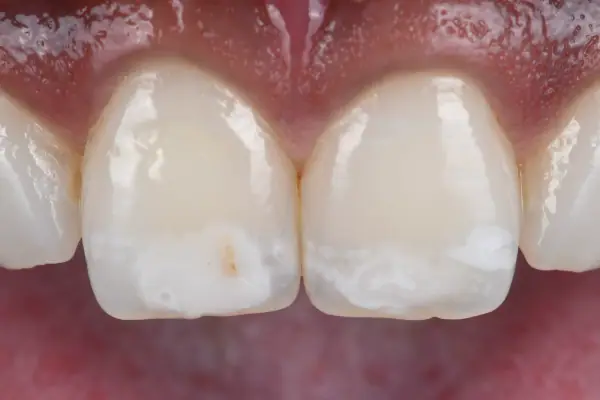
This young patient came to the practice with a significant aesthetic concern linked to clearly visible white spots on her two central incisors. Although harmless, they had a real impact on her smile and on how she saw herself. The aim: to make these spots less visible while preserving as much healthy tissue as possible, through a minimally invasive approach combining etching and resin infiltration (the Icon technique) with composite micro-layering, in eight steps.

  • white spots
  • resin infiltration
  • Icon technique
  • micro-layering
  • polarised light
  • preserved enamel

Dr Jérémy Haccoun, dentist Updated

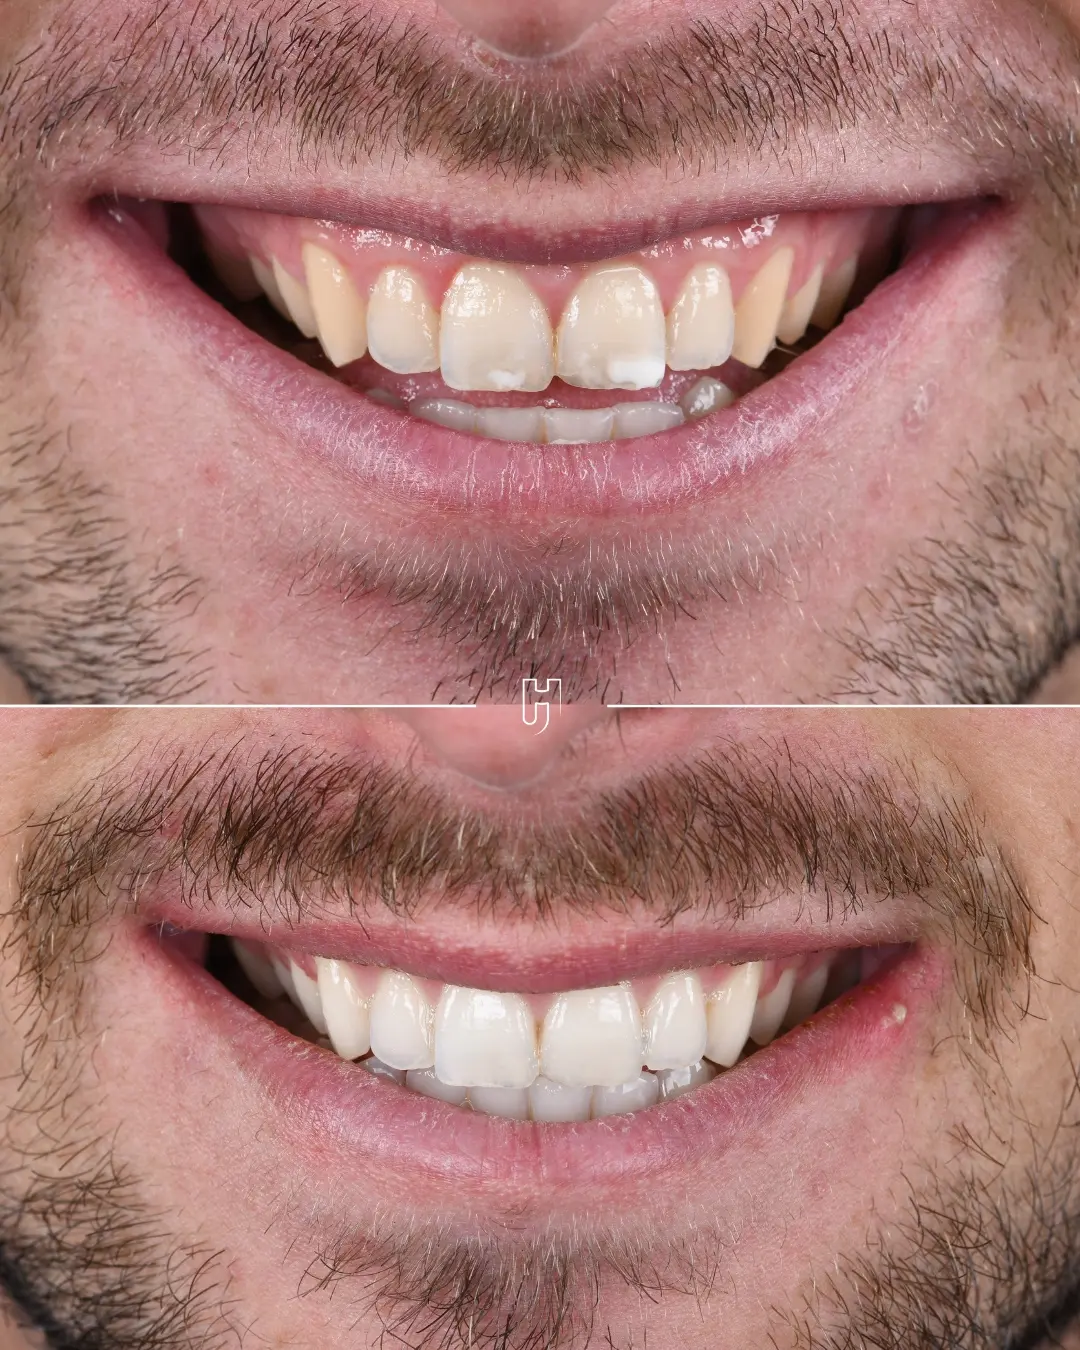
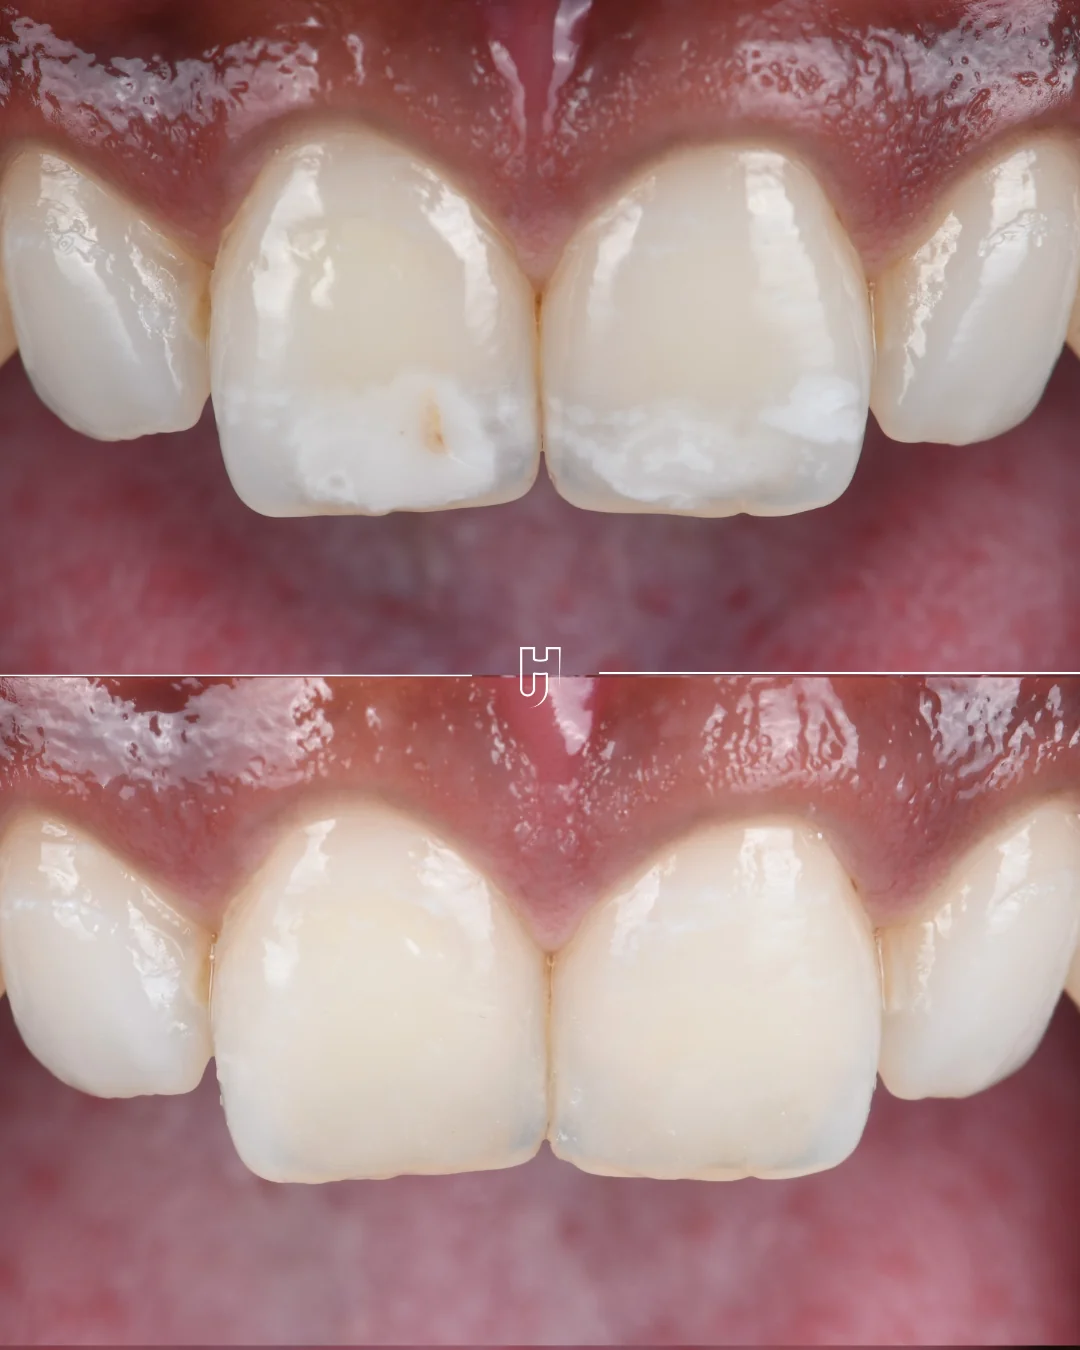
Before and after treatment of white spots on the two central incisors: the opacities less visible, the enamel preserved.
01

Two central incisors marked by white spots

This young patient came to the practice with a significant aesthetic concern linked to clearly visible white spots on her two upper central incisors (11 and 21). Although harmless, they had a real impact on her smile and on how she saw herself.

A white spot is an area of less mineralised enamel, which scatters light differently from healthy enamel. It is the depth of the spot that guides the treatment.

02

Assessing the lesions objectively before deciding

The aim was to make these spots less visible while preserving as much healthy tissue as possible, through a minimally invasive approach combining etching and resin infiltration with micro-layering.

  1. Analysis and photography: polarised light and transillumination to assess the extent of the lesions objectively and guide the clinical decision.

  2. Outlining the areas to treat: the extent of each spot is marked precisely, for a targeted, conservative intervention.

03

Etching, air abrasion, drying, infiltration, micro-layering

With a rubber dam in place, the steps of the Icon technique follow one another in a precise order.

  1. Etching: the etching gel is applied, which makes resin infiltration possible.

  2. Air abrasion: micro air abrasion to reach the spot and optimise adhesion.

  3. Drying (Icon-Dry): the ethanol gives a preview of the final result; if the spot fades, the infiltration will be effective.

  4. Resin infiltration (Icon): the resin penetrates by capillary action and brings the lesion’s refractive index close to that of natural enamel, so that the treated area blends in optically.

  5. Composite layering: localised composite micro-layering restores the volume.

  6. Polishing and a final check, under natural and polarised light.
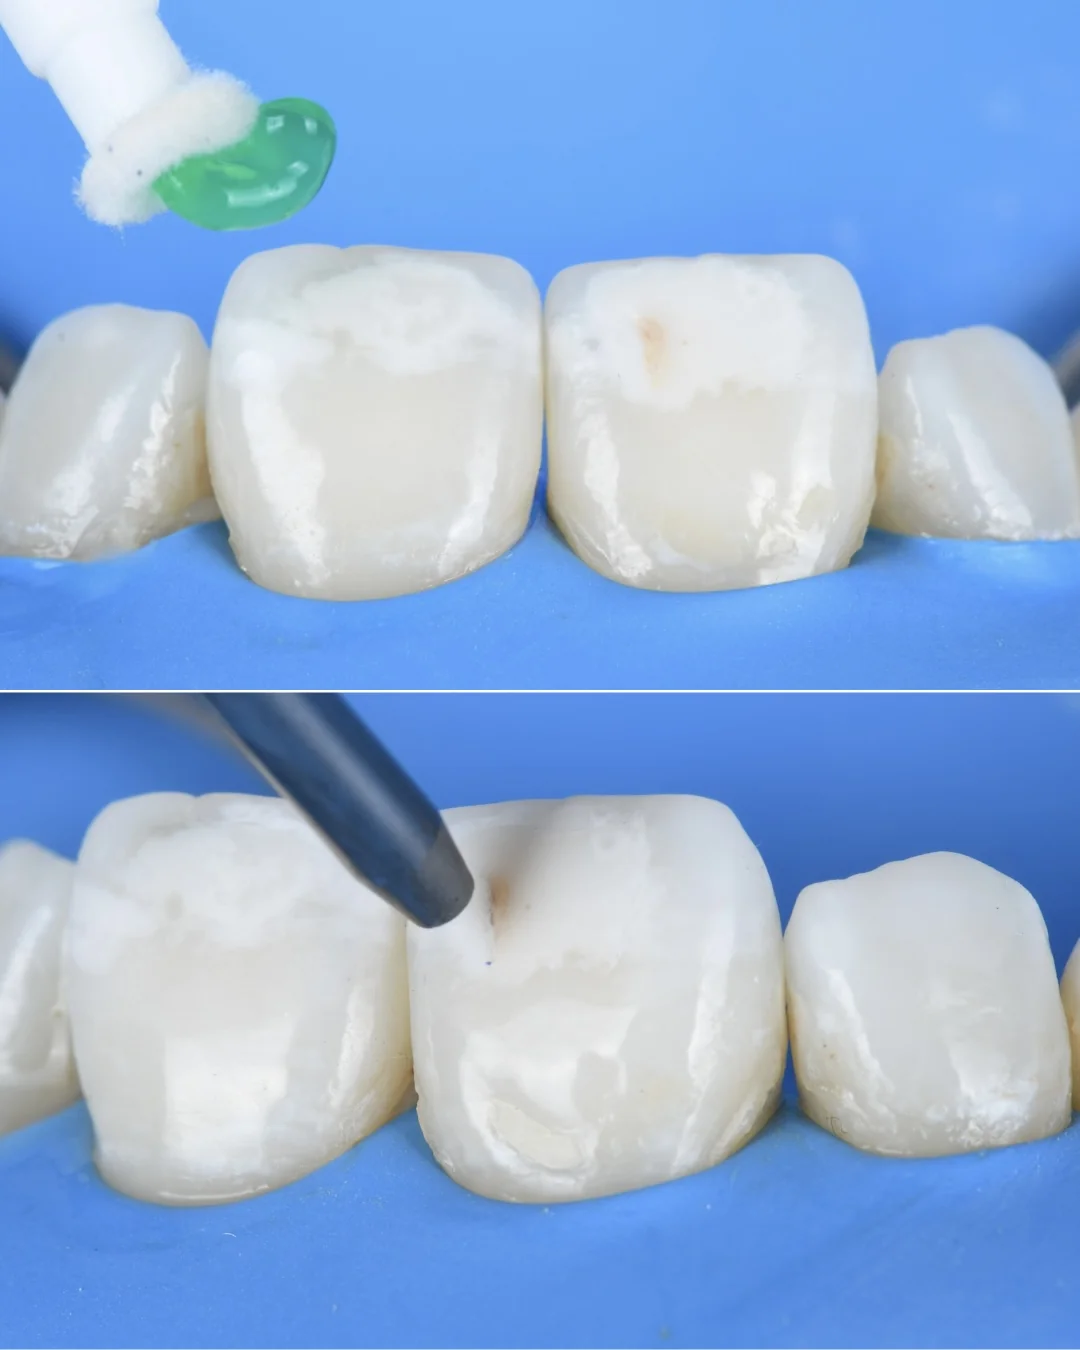
Under rubber dam, two steps: at the top, the green etching gel applied to the incisor; at the bottom, the micro air abrasion nozzle on the spot.
Under rubber dam: at the top, etching, with the gel applied to the spot; at the bottom, micro air abrasion, to reach the spot and optimise adhesion.
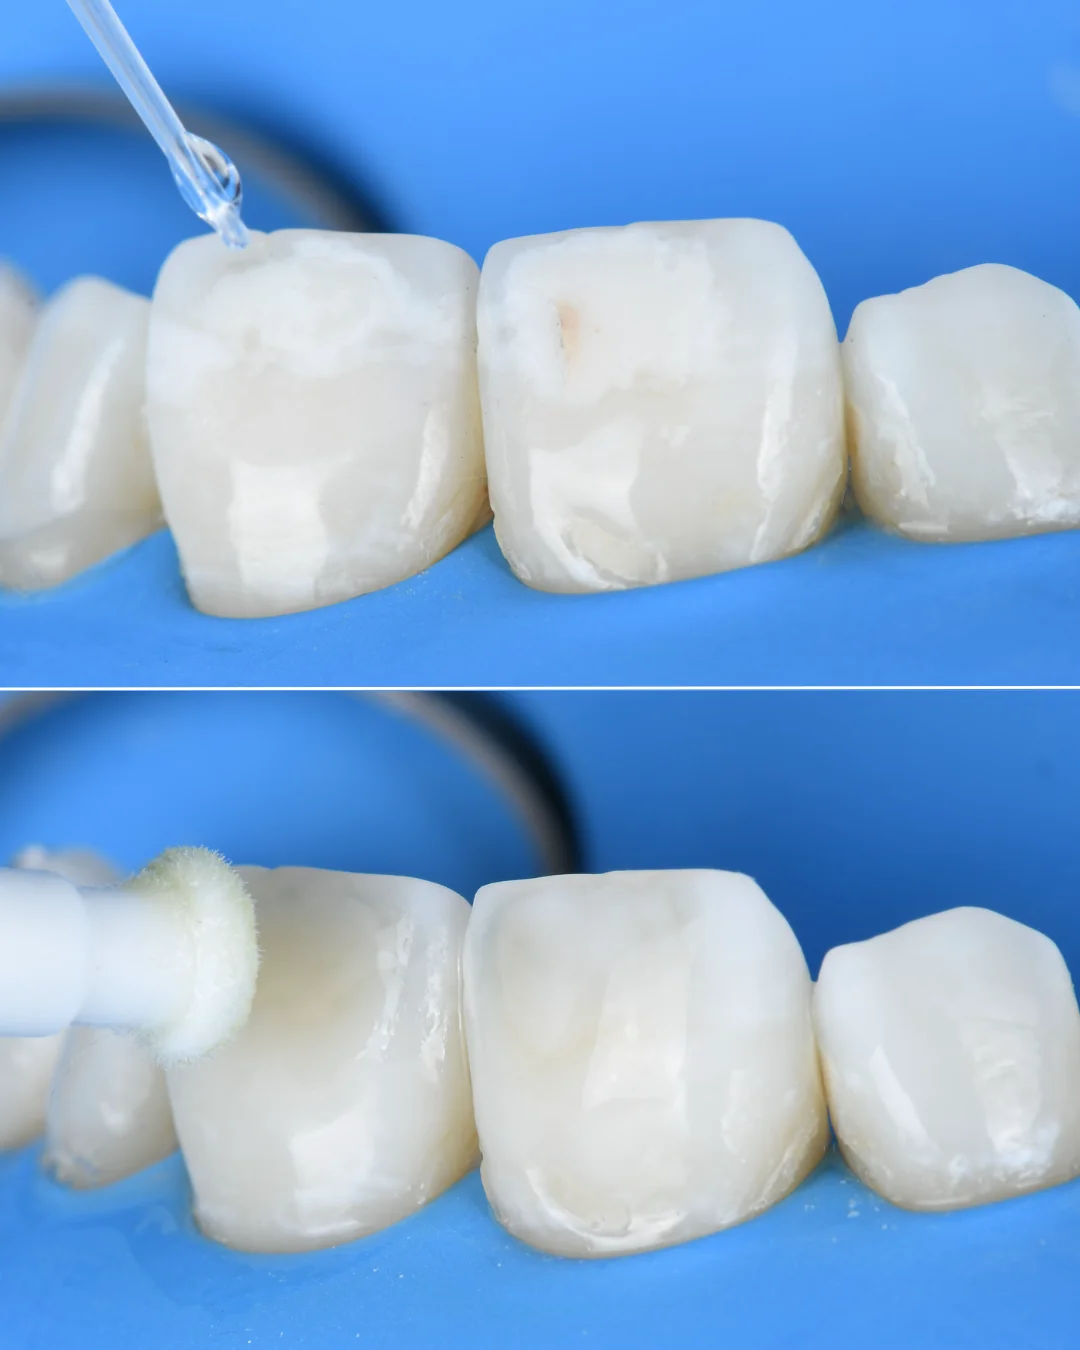
Under rubber dam: at the top, a drop of ethanol placed on the incisor for drying with Icon-Dry; at the bottom, the applicator of the infiltration resin on the tooth.
At the top, drying (Icon-Dry): the ethanol gives a preview of the result; if the spot fades, the infiltration will be effective. At the bottom, resin infiltration, by capillary action.
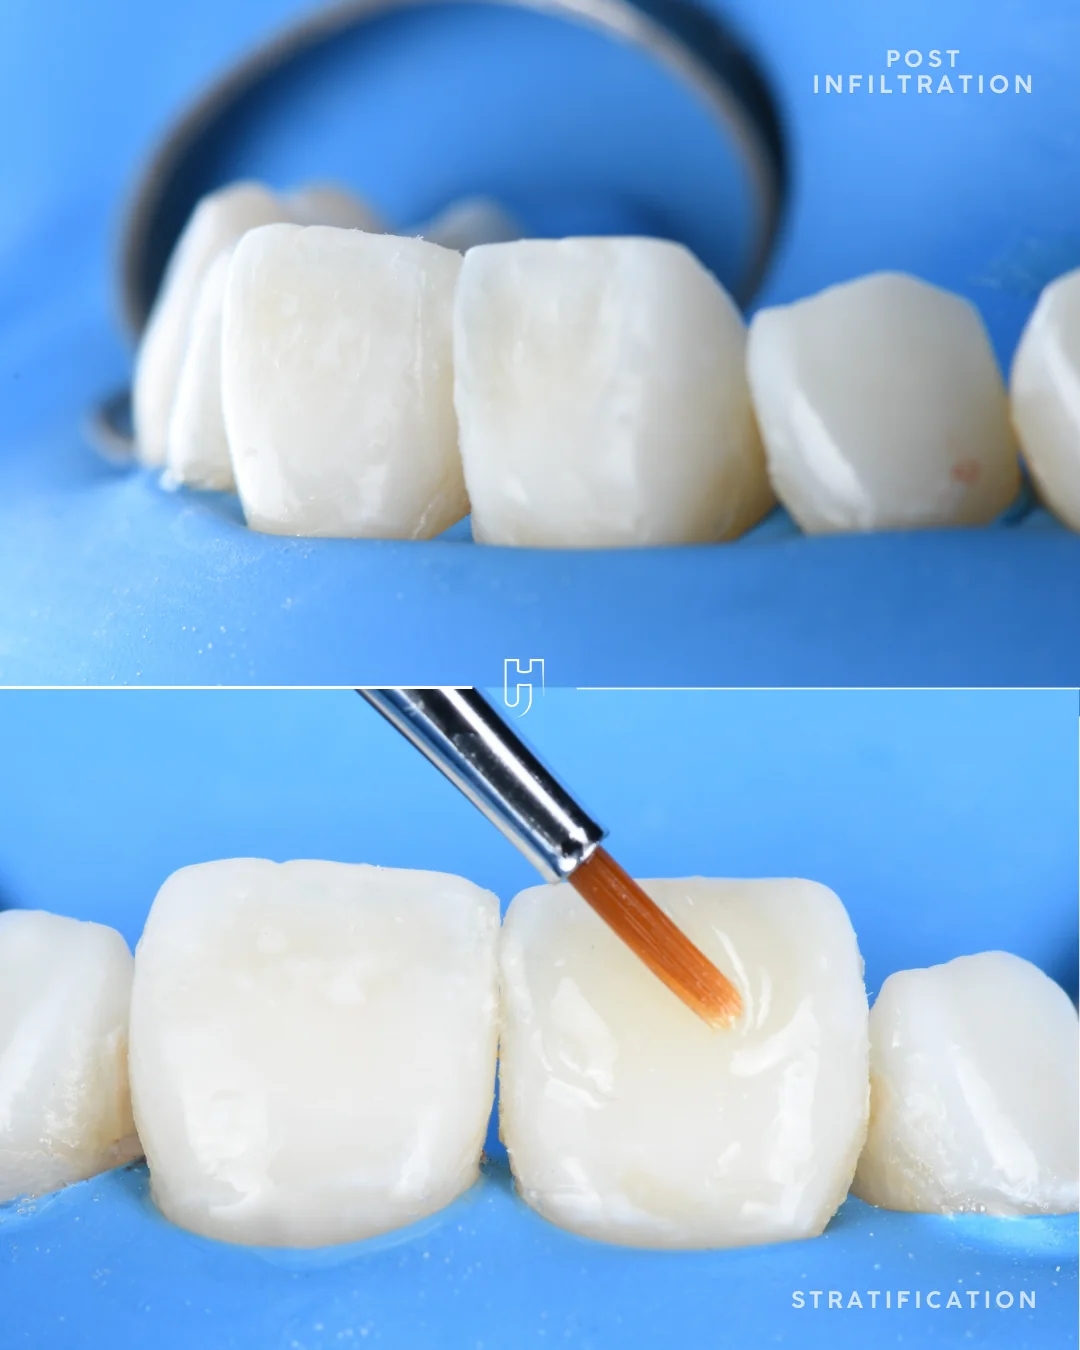
Under rubber dam: at the top, the incisors after infiltration, with the spots less visible; at the bottom, the brush used for composite micro-layering on the incisor.
At the top, after infiltration: light passes through the enamel more evenly. At the bottom, localised composite micro-layering, which restores the volume.
04

A more even smile, with the enamel preserved

After polishing, the check under natural and polarised light shows less visible spots and a continuous surface: a more even smile, one she is comfortable showing, with as much healthy tissue as possible preserved.

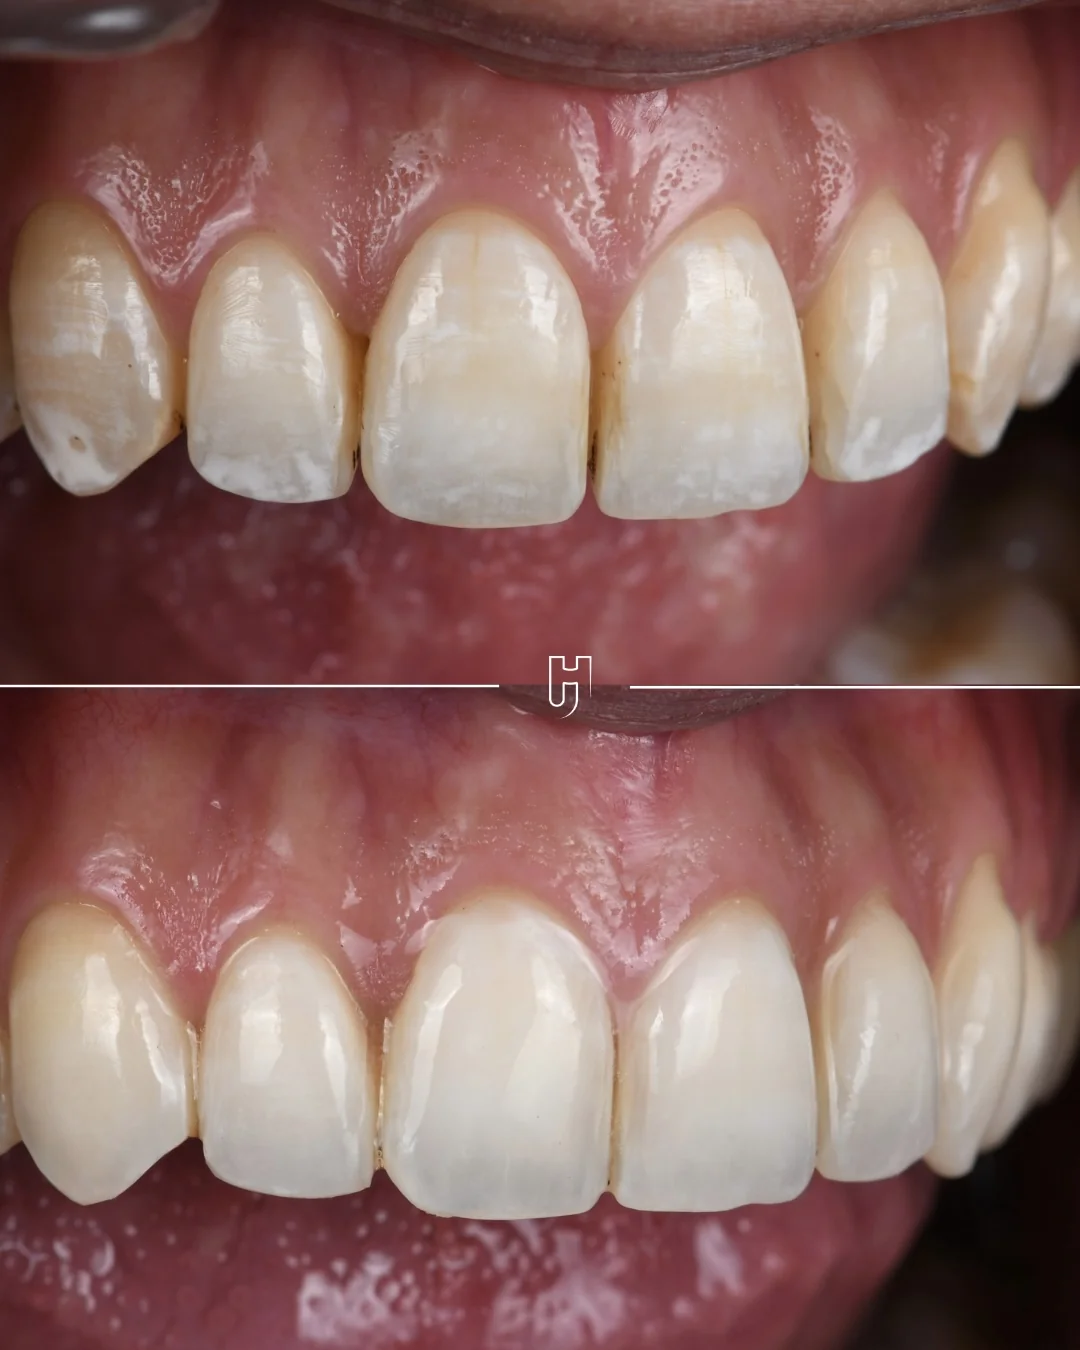
An individual result: it depends on the depth of the lesions, which the examination tries to anticipate. Another case of white spots shows a different approach, with whitening beforehand.
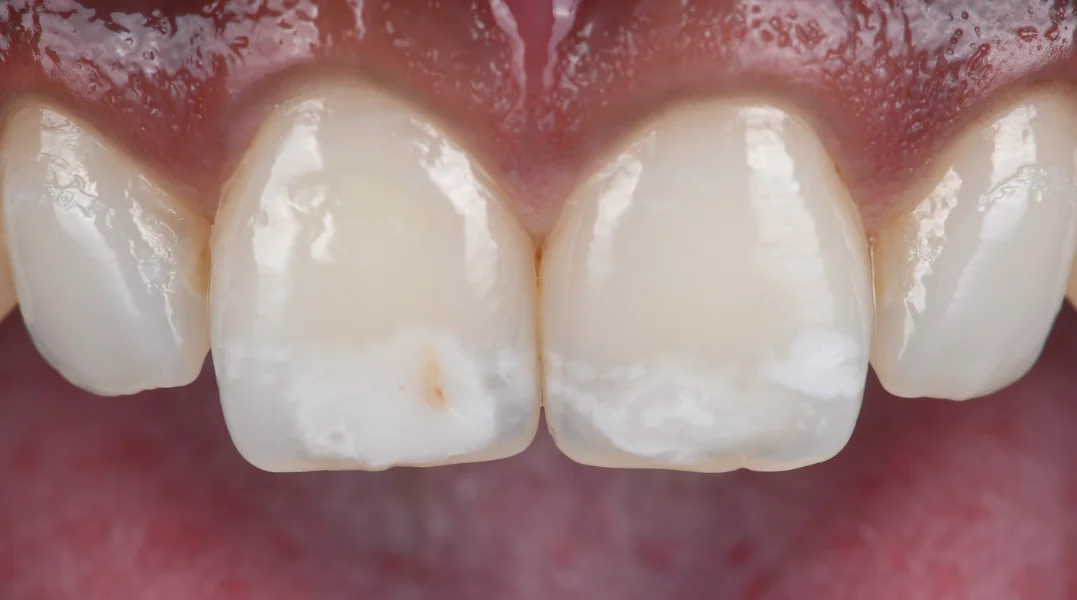
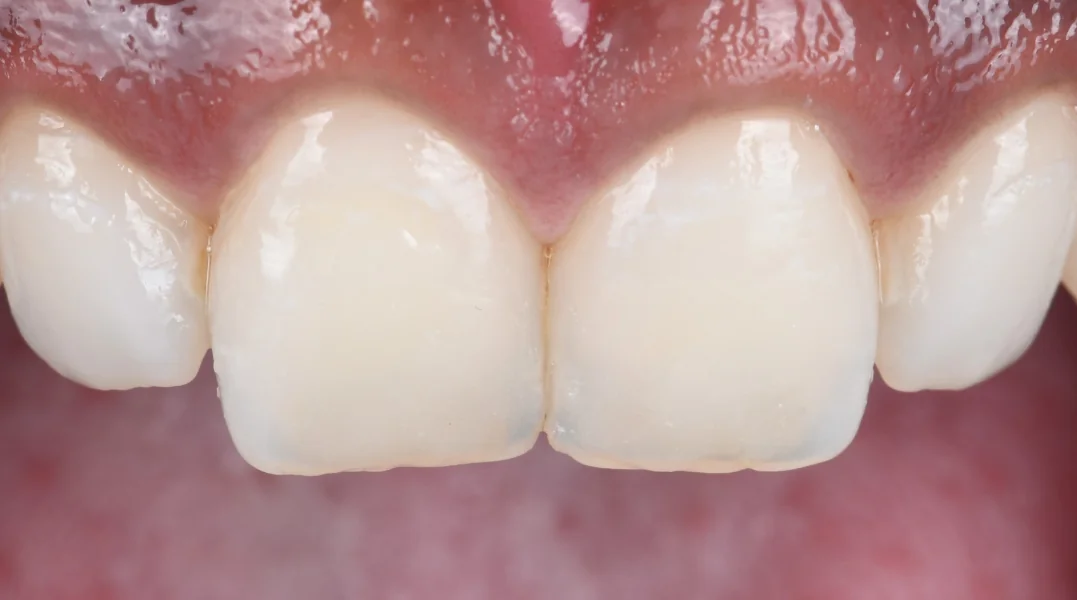
The two central incisors before treatment: clearly visible white spots in the third of the tooth nearest the biting edge.
The same incisors after etching, resin infiltration and micro-layering: the spots less visible.
BeforeAfter
The central incisors before and after treatment: the slider moves from one to the other. An individual result: it depends on the depth of the lesions.

Other similar cases.

White spots on teeth.

An area of enamel that has become porous, whose cause and depth determine the treatment: monitoring, whitening or resin infiltration.

Message us