White spots and a smile to harmonise
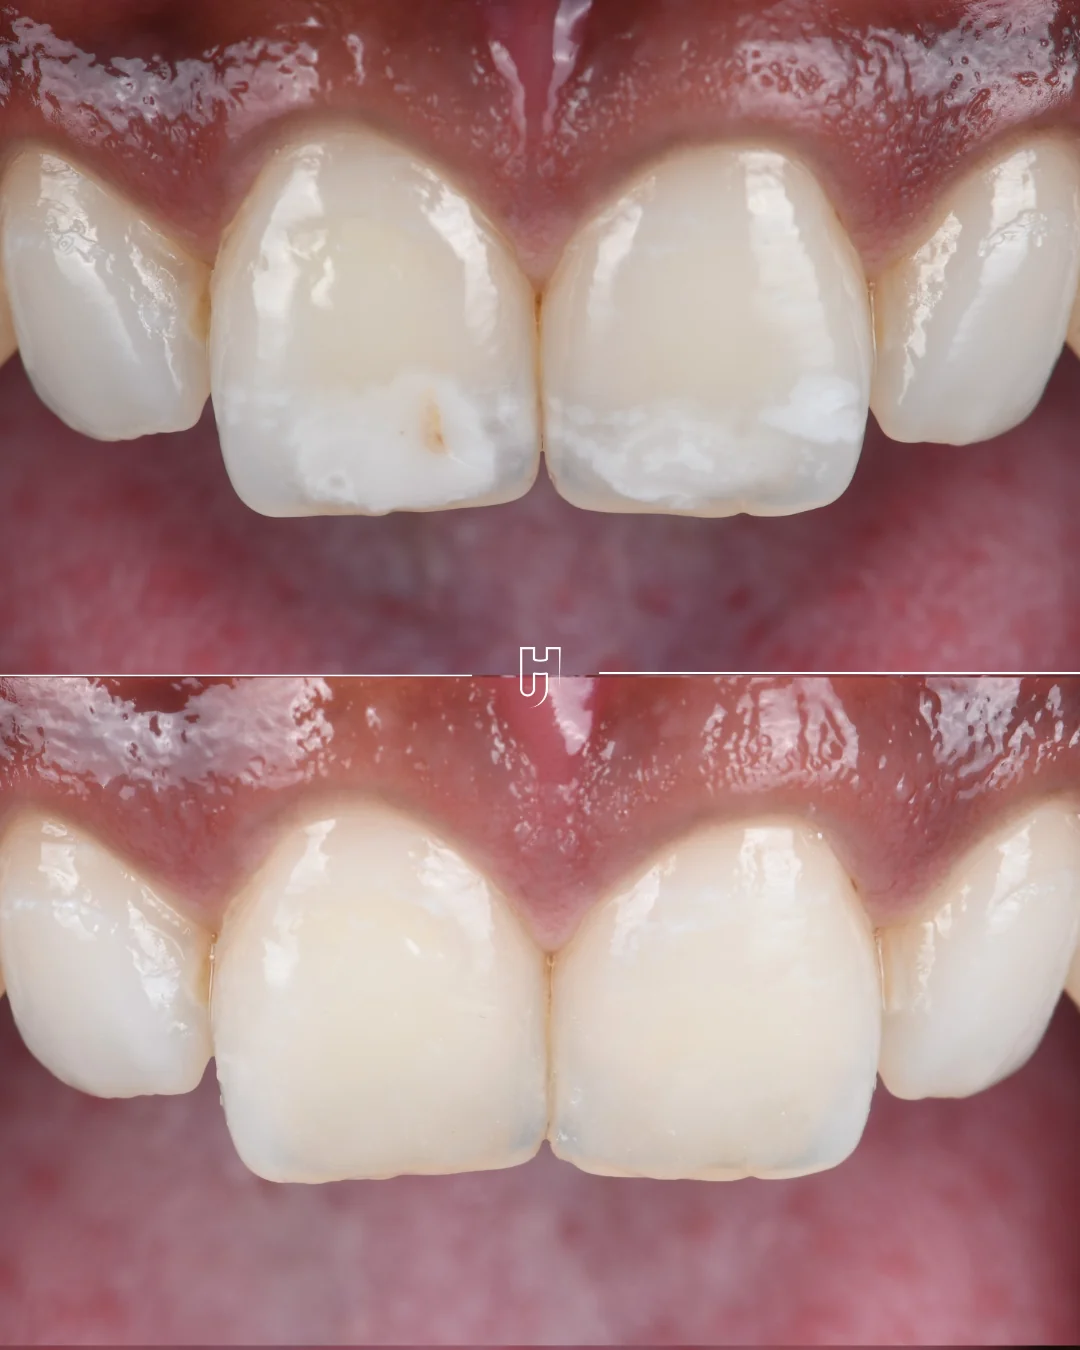
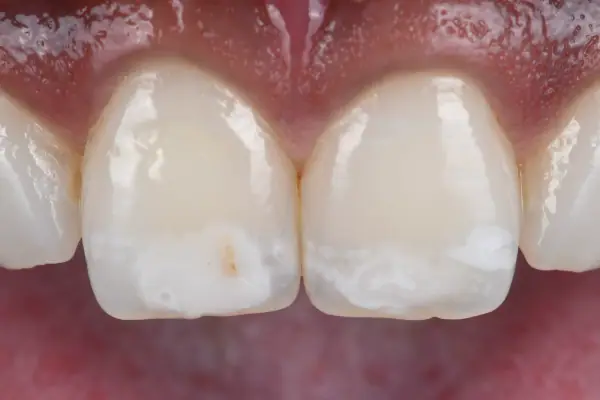
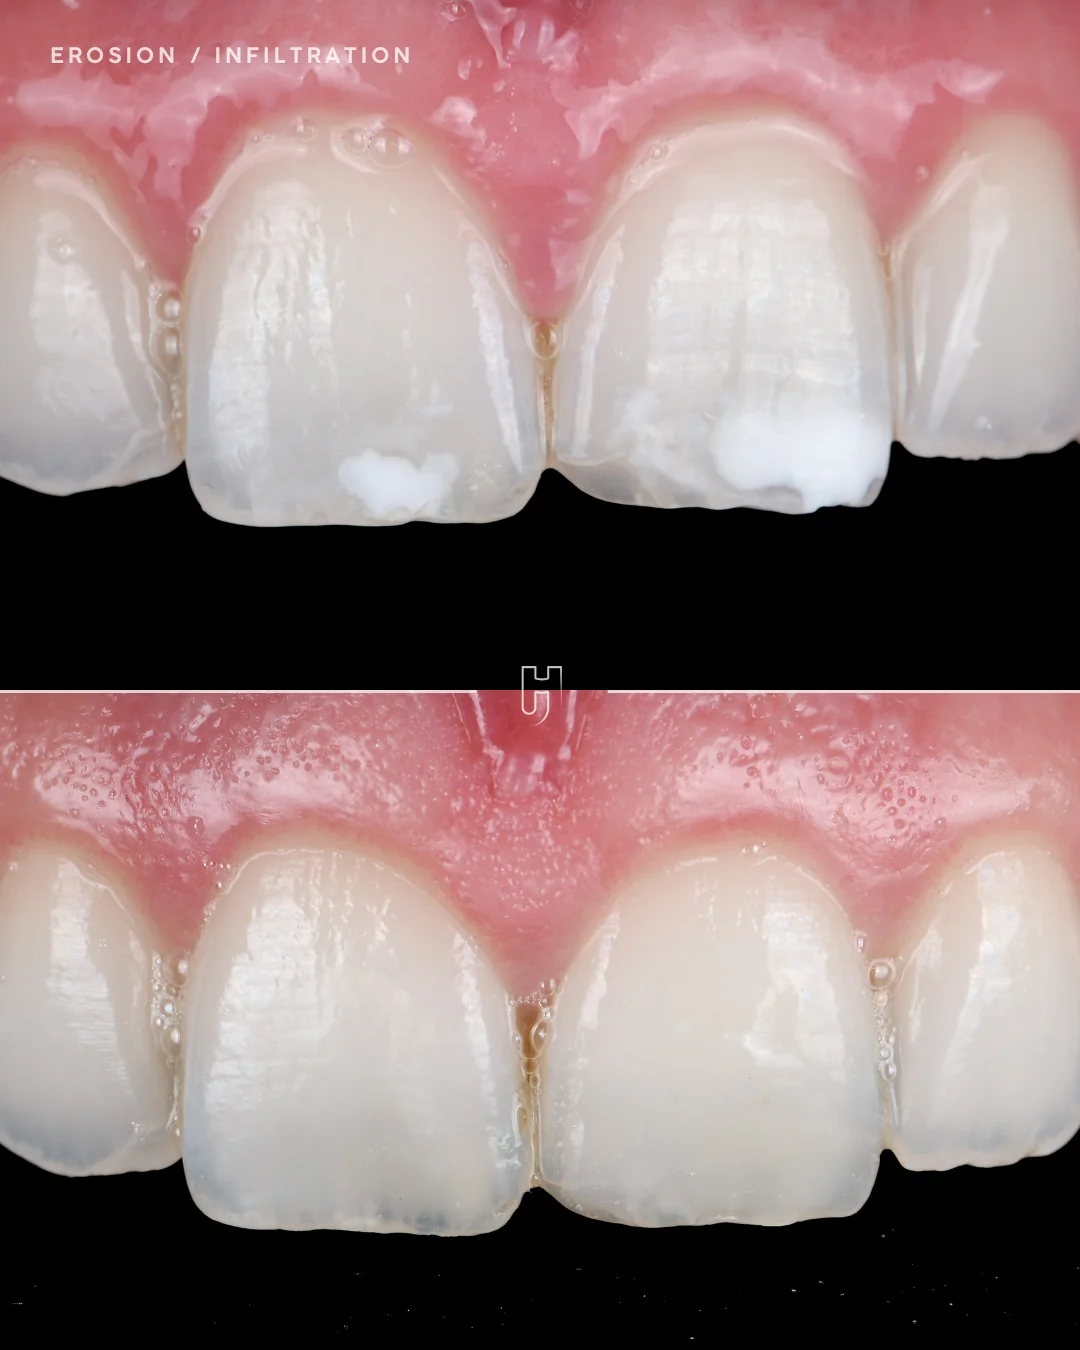
White spots on the two upper central incisors (11 and 21) created a lack of uniformity and a real aesthetic concern when smiling: the opacities drew the eye.
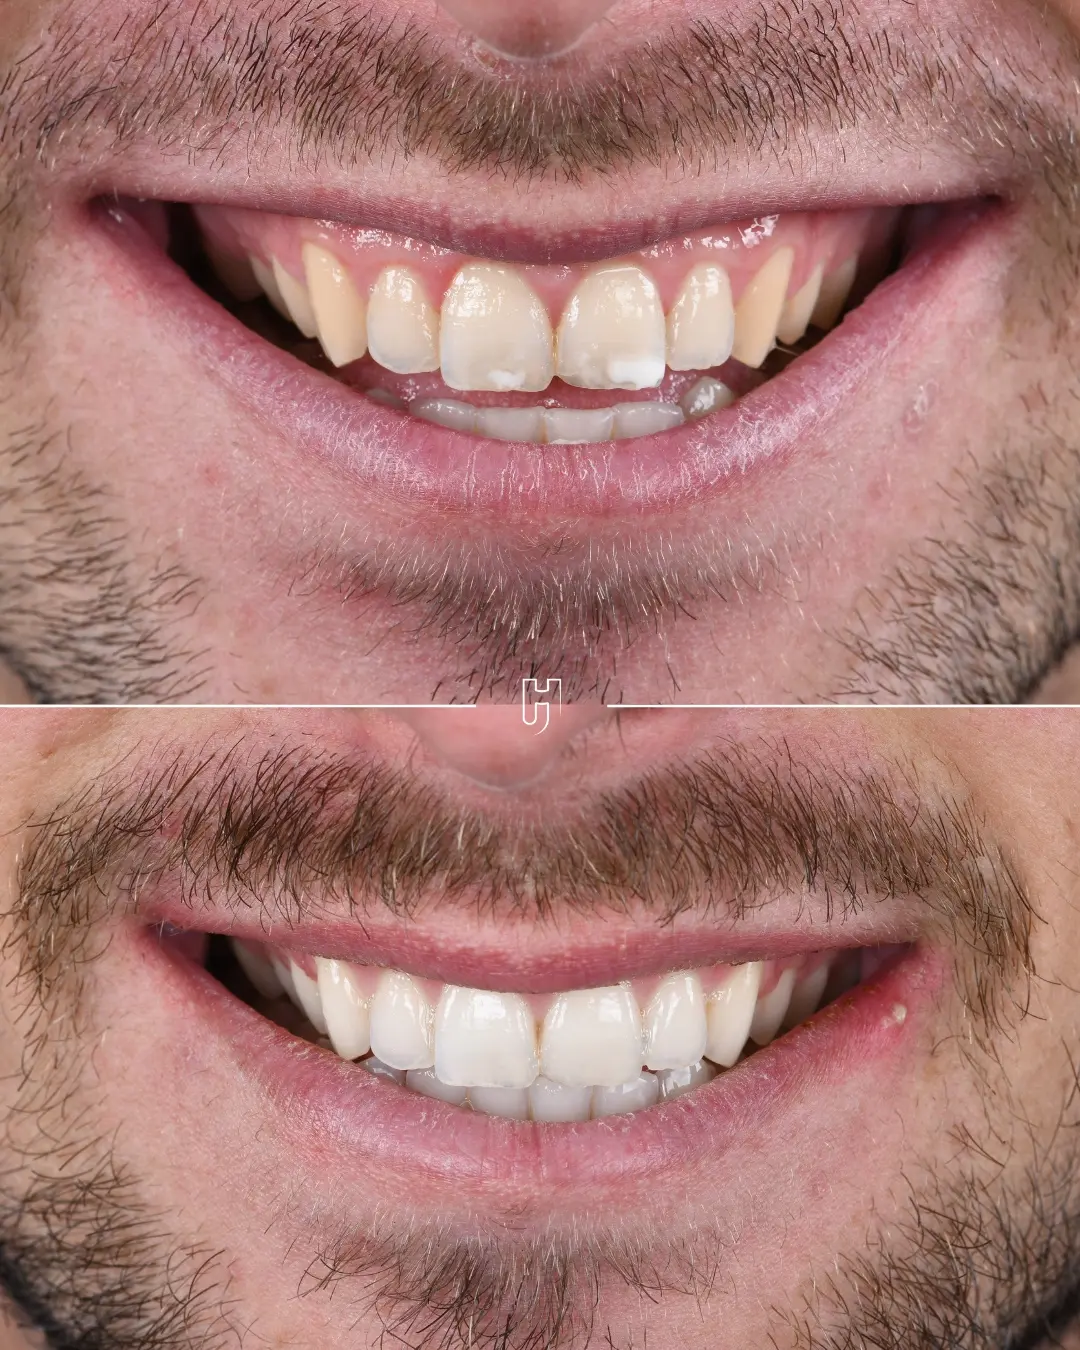
In this type of situation, the aim is not only to whiten the teeth or to correct an isolated white lesion. The challenge is to achieve an overall integration that is natural and coherent: a harmonious overall shade, spots that no longer draw the eye, and a smile that reads as a whole.
Treating the shade, the lesion and the integration at the same time
A white spot scatters light differently from healthy enamel: the stronger its contrast with the shade of the tooth, the more visible it is. Hence the choice to whiten first, to reduce this contrast, before treating the lesion itself.
The treatment was therefore planned on three levels at once: the overall shade, how the lesion is perceived and the final aesthetic integration. This approach follows a deeply conservative logic: preserving as much tissue as possible, intervening in a targeted way and aiming for a harmonious result, without moving straight to more invasive solutions.
Whitening, infiltrating, restoring volume
The protocol combined three steps, in this order.
At-home whitening over three weeks, to reduce the contrast between the white spots and the colour of the natural enamel.
Etching and resin infiltration (Icon technique) of the two upper central incisors (11 and 21): the resin penetrates each spot and brings its appearance closer to that of the surrounding enamel.
Composite micro-layering, to restore the volume of teeth 11 and 21.
Each step prepares the ground for the next: the shade first, then the lesion, and finally the volume.
A well-judged treatment rather than a complex one
Behind a result that may look simple, there is in fact a sound reading of the indication, a rigorous protocol and constant attention to detail. In aesthetic dentistry, how well judged a treatment is often counts for more than how complex it is.
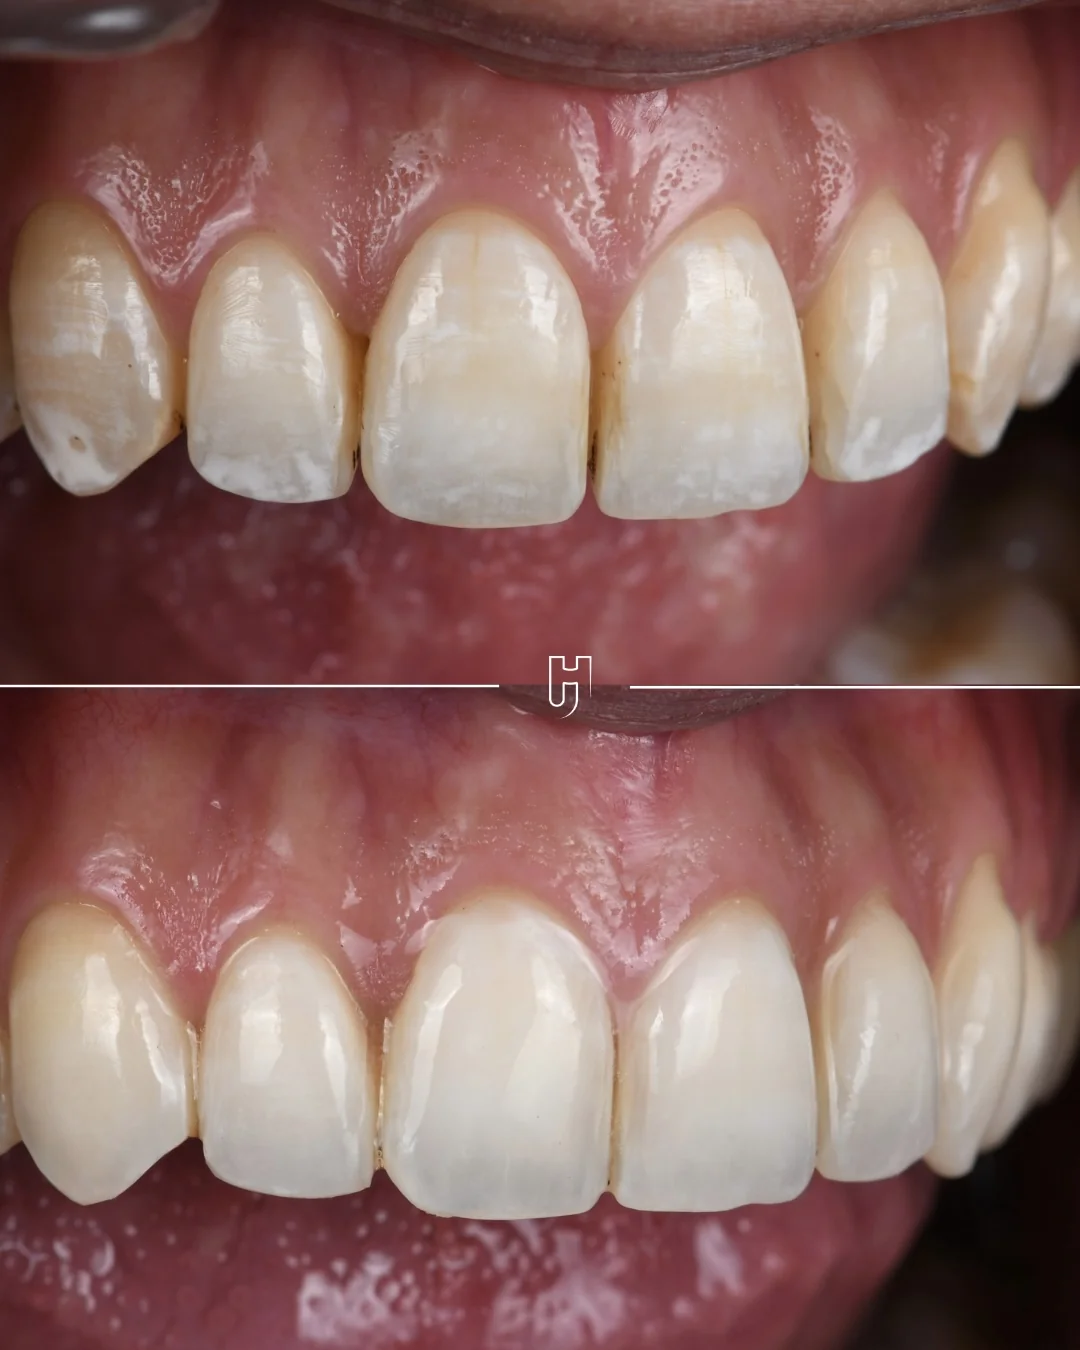
The response varies with the depth of the lesions, and the result is checked once the shade has stabilised. Another case of white spots shows a different response, without prior whitening.